The BoldSign mobile app is now available. Visitthis link for more details and give it a try!

The BoldSign mobile app is now available. Visitthis link for more details and give it a try!

Request Demo

Features

Explore the BoldSign features that make eSigning easier.

Step-by-Step Guide to Using the BoldSign Mobile App for eSignatures

Step-by-Step Guide to Using the BoldSign Mobile App for eSignatures

We recently released the beta version of the BoldSign mobile app. The goal of this release is to collect feedback from users and address it. If you haven’t tried our mobile app yet, please do so and share your feedback with us. The app is available on both the Google Play Store and TestFlight, allowing you to install it on your Android and iOS devices.

With the BoldSign mobile app, you can streamline your eSignature workflows, manage documents, and collect signatures on the go. The app complements our web application by supporting most of the features available on the web platform.

This blog post provides a step-by-step guide to help you get started with the BoldSign mobile app and perform basic eSignature operations quickly and efficiently with it.

Installing the BoldSign mobile app

Install the BoldSign mobile app on your iOS and Android devices as follows:

iOS

  1. Ensure the TestFlight app is installed on your iOS device. If it isn’t, install it from the App Store.
  2. Open this link on your device.
  3. Follow the prompts to install the app.

  4. Open the app to get started. 

Android

  1. Open this link on your Android device.
  2. Install the BoldSign mobile app from the Play Store.
  3. Open the app to get started.

Logging in to the app

Upon opening the BoldSign app, you will be prompted to log in. If you already have a BoldSign account, tap the Login button and enter your credentials. If you’re new to BoldSign, create an account by tapping Create account on the screen.
BoldSign Mobile App Login Screen

After logging in, you will be directed to the Dashboard screen.

BoldSign Mobile App Dashboard Screen

Signing a document as a recipient

You can sign any document you are added to as a recipient. Follow these steps to sign a document from the BoldSign mobile app:

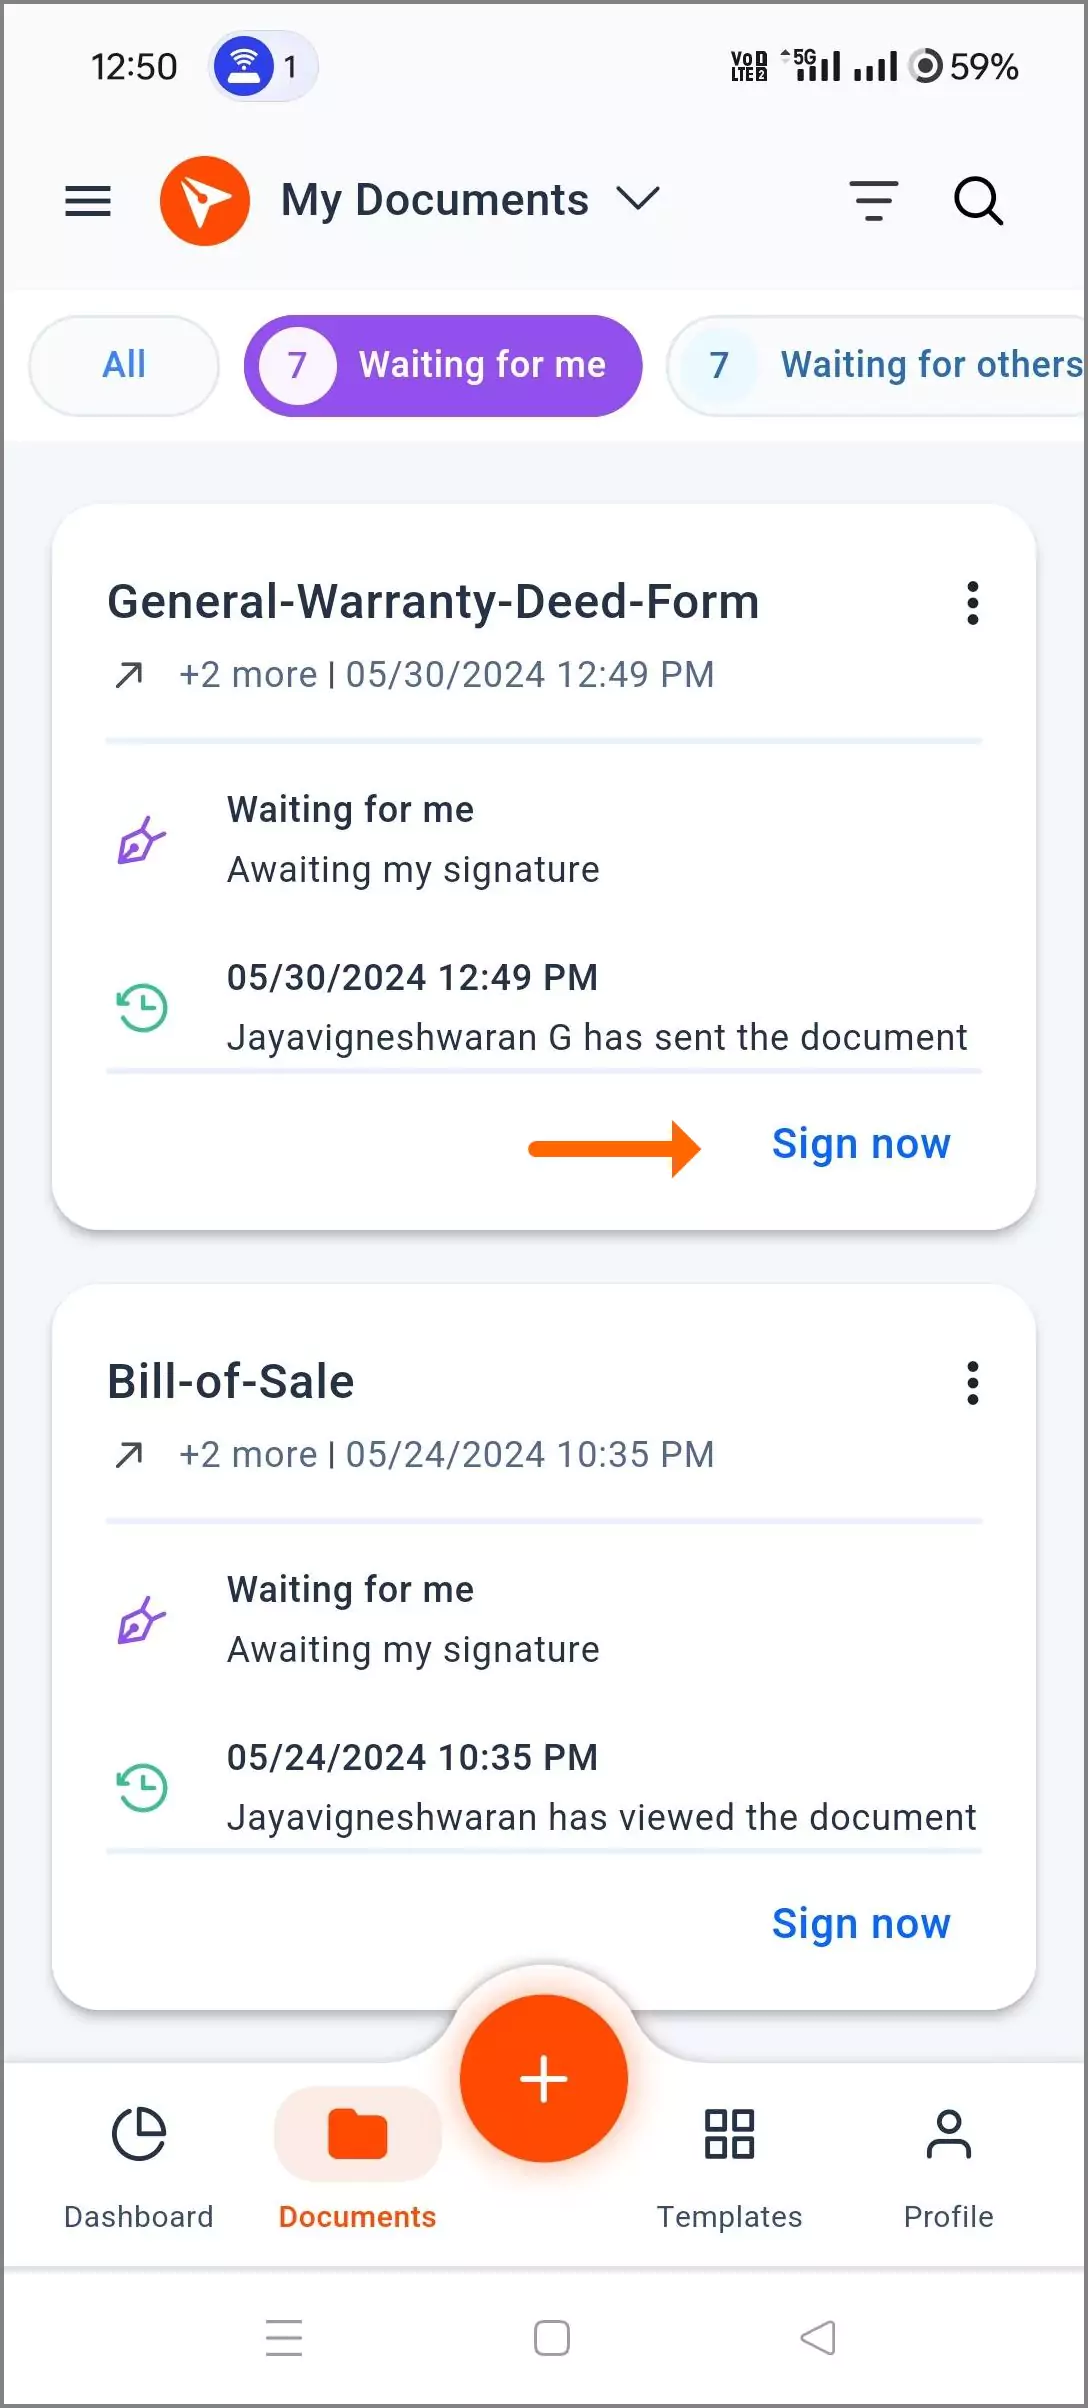
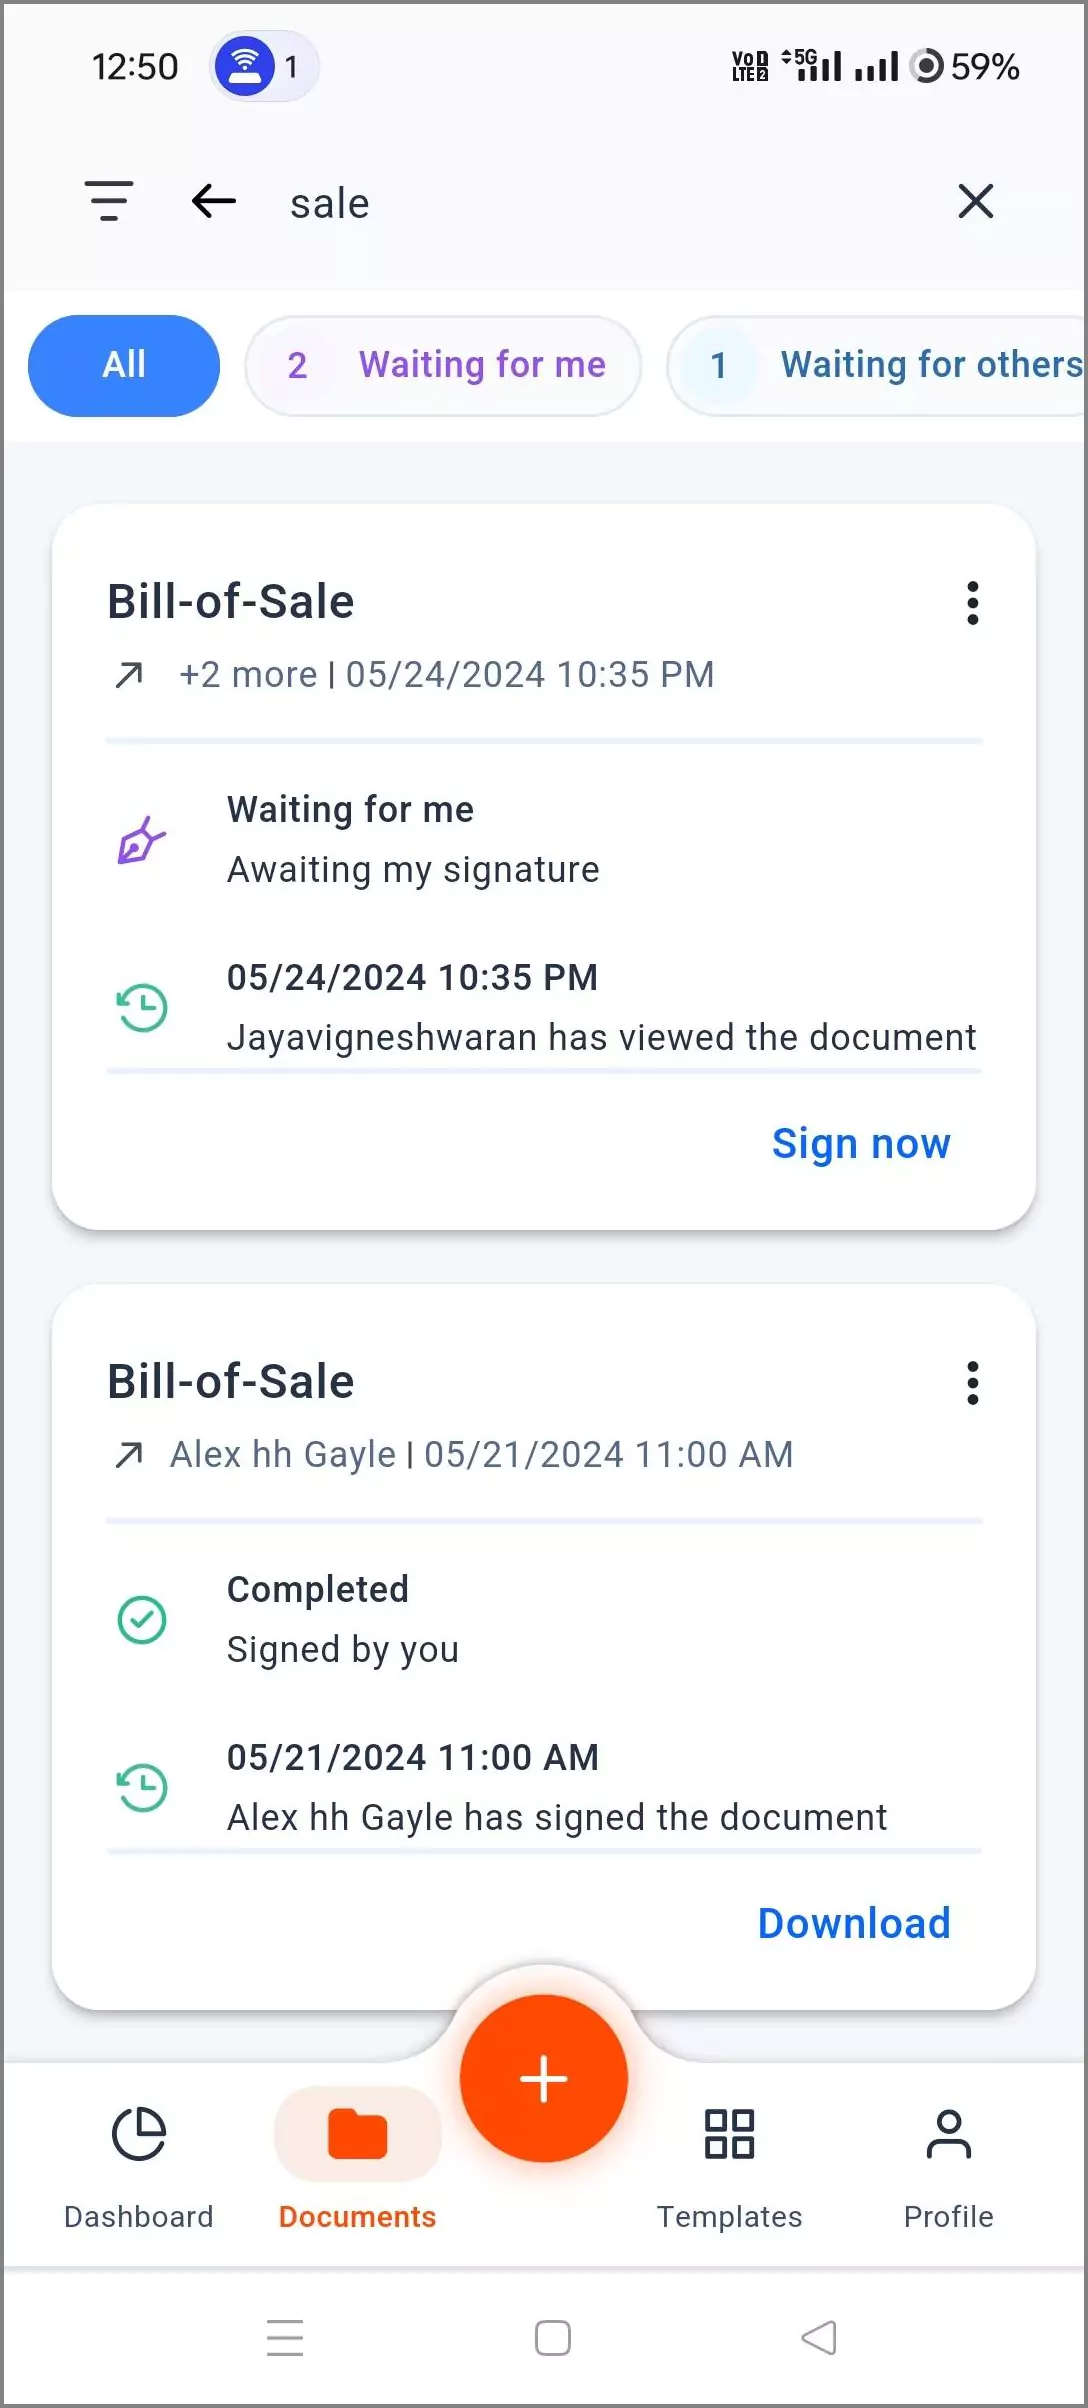
  1. To find documents waiting for your signature, tap the Waiting for me card on the Dashboard screen or navigate to Documents in the bottom navigation bar and then tap the Waiting for me status at the top.

  2. To sign a particular document, tap Sign now displayed on the document’s card. Alternatively, tap the three-dot menu on the document card and select the Sign document option.

    Document with Sign Now Option
    Document with Sign Now Option
  3. Accept the Electronic Signature Disclosure Terms and continue.

  4. Tap the Start signing button and fill in the form fields assigned to you. Move to the next field by tapping the Next field button.

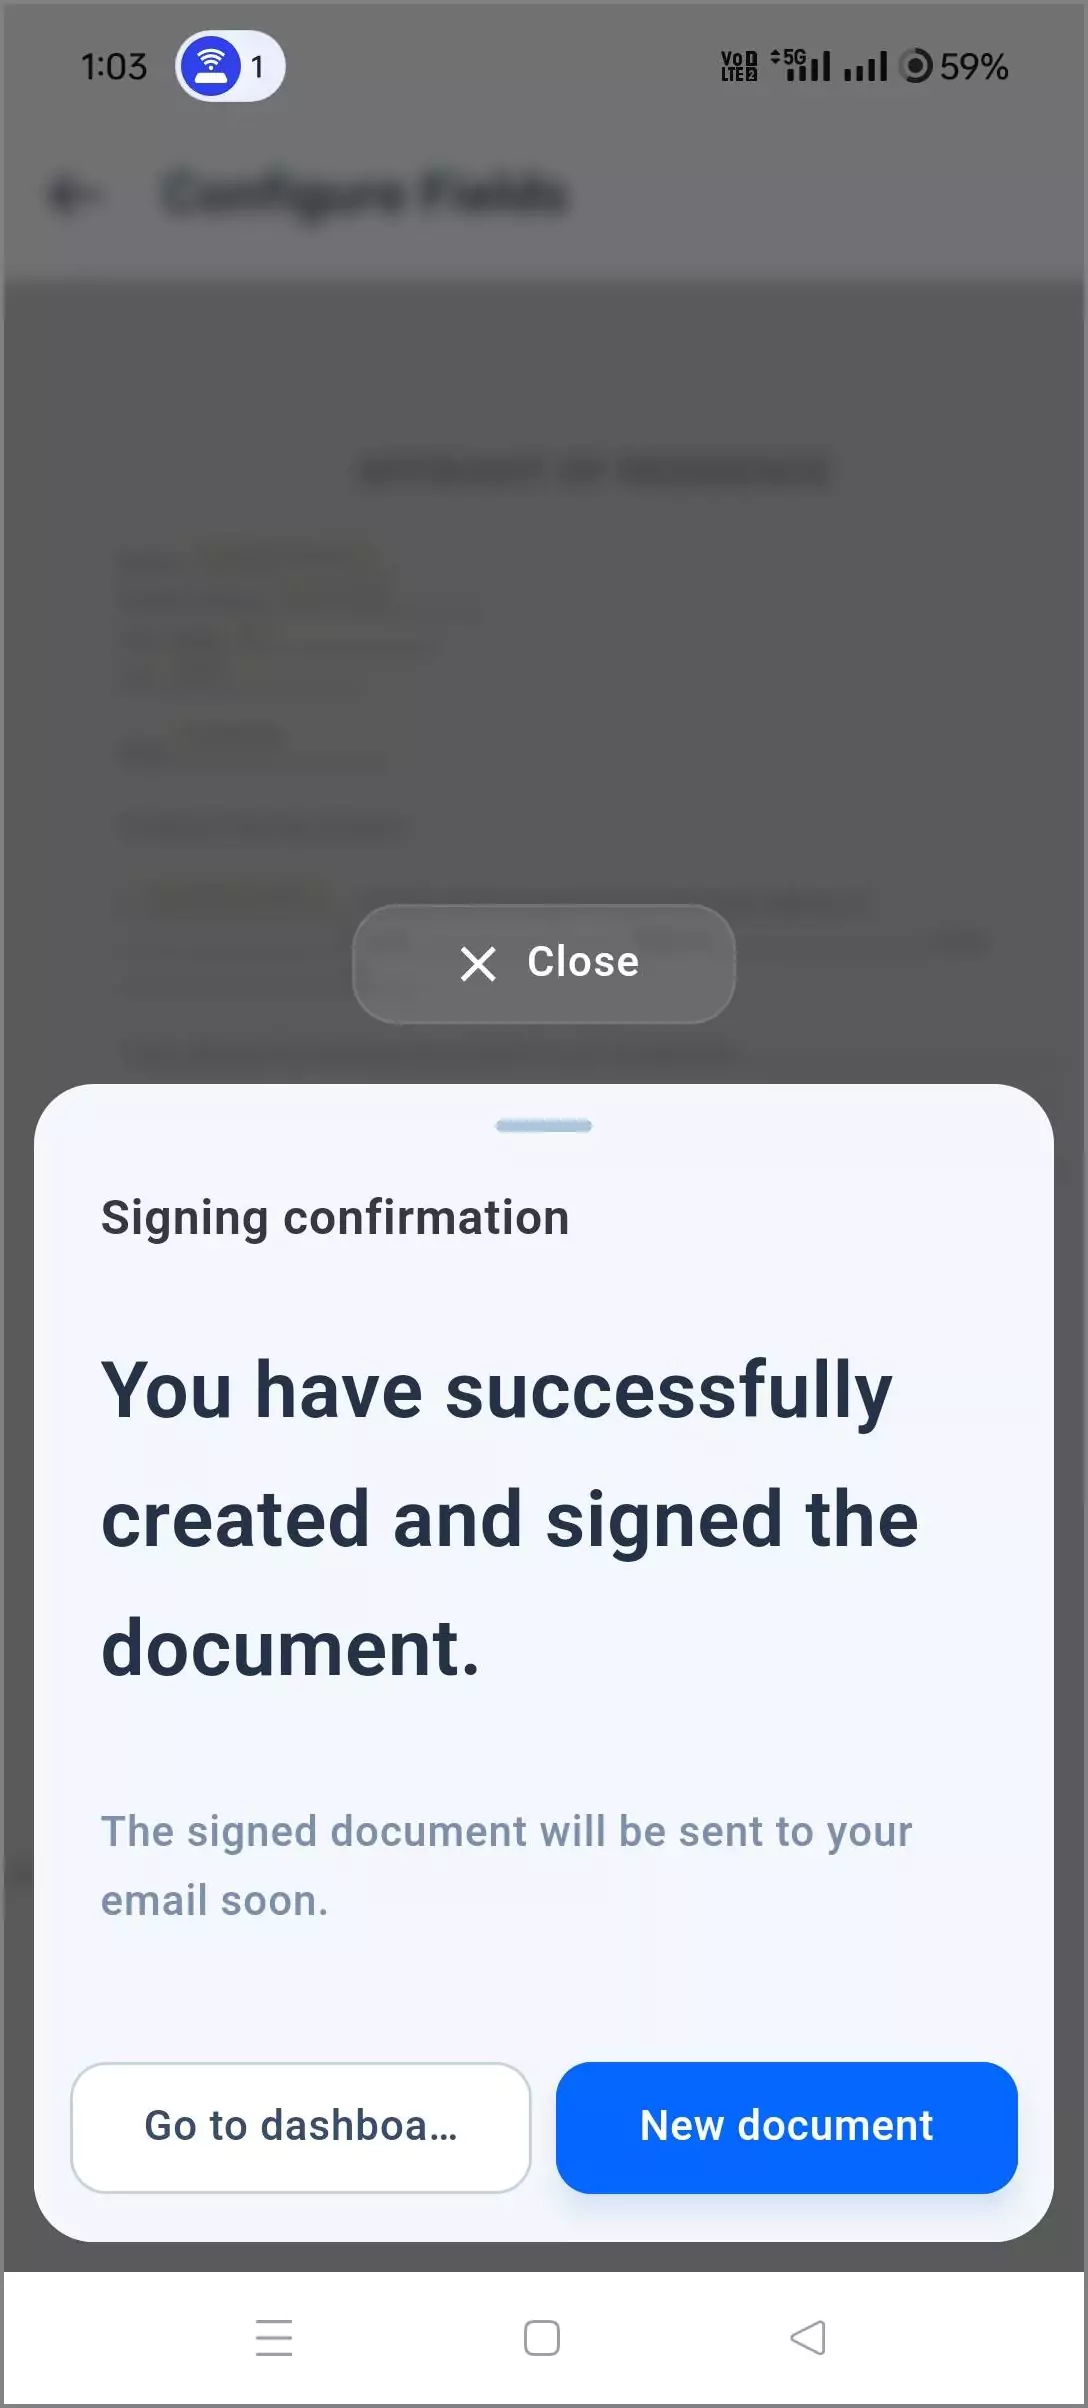
  5. Once all the fields are completed, tap the Complete signing button.

You have now successfully signed the document.

Sending a document for signature

You can request signatures from others for your contracts or agreements by following these steps:

1. Start a new document

  1. Tap the + button at the center of the bottom navigation bar.
  2. In the Create New bottom sheet, tap Create New Document. This will take you to the Upload Documents screen.
Create New Bottom Sheet

2. Upload your document

  1. Tap Upload Documents to upload files from your device storage.
  2. Tap Continue. You will be taken to the Recipient List screen.

3. Add recipients

  1. Tap Add recipient.
  2. Enter the recipient’s name and email address, select the recipient type, and then choose whether you want to require authentication and include a private message. Tap Add recipient. You will be taken back to the Recipient List.
  3. Use the buttons at the bottom to configure the recipients as needed, and then tap Next to proceed to the Prepare Document screen.
Adding Recipients to the Document

4. Prepare the document

  1. Add CC recipients, change the document title, add a common message, and adjust document settings such as branding, expiration, and auto reminders as needed.
  2. Tap Configure fields to go to the Configure Fields screen.

5. Configure fields

  1. Add the necessary form fields to the document by tapping + Fields or by tapping and holding on the document.
  2. After adding the required fields, tap Continue and then tap Send document.

6. Review and send

  1. A document summary will be displayed. Check the document details.
  2. Tap Send.

You have successfully sent the document for signature.

Self-signing a document

Self-signing a document refers to the process of adding your digital signature to your own document. A self-signed document confirms that you have reviewed and agreed to the terms or statements in the document.

The self-signing process is very similar to sending a document for signature to others. Follow the steps in the “Sending a document out for signature” section through step 2, “Upload Your Document.” Then:

  1. In the Recipient List, tap Add Me at the bottom of the screen.
  2. In the Configure Fields screen, place the required form fields, fill them out, and tap Finish.
Self-Signing a Document

You have now successfully self-signed the document. You can download the signed document for future use.

Downloading a signed document

Once all signers have finished signing a document, the sender, signers, and CC recipients can download the signed documents from the mobile app. A copy of the signed document will also be emailed to all participants immediately after the signing process is completed.

Follow these steps to download the signed document:

  1.  Navigate to the Documents screen.
  2.  Tap Download on the completed documents.

Alternatively, you can open the document options and tap Download document to save the signed document to your device’s local storage.

Note: Make sure you have granted the app permission to access your device’s storage.

Managing documents

The BoldSign mobile app offers a variety of options to help you organize, manage, and retrieve your documents. Some of them are:

Searching for documents

Easily find documents by entering part of the document’s title. Just navigate to the Documents screen and in the search box, start entering text. Documents whose titles contain your search characters will be displayed.
Searching for Documents

Filtering documents

Documents can be filtered by tapping the filter icon on the Documents screen. The available filtering options include:
  • Document type: Choose between sent documents, received documents, or both.
  • Document status: Specify the status of the document you are looking for. The options include all, waiting for me, waiting for others, needs attention, declined, completed, revoked, and expired.
  • Sent by: Choose the sender of the document.
  • Recipients: Choose the recipients of the document.
  • Sent between: Choose a date range to view all documents sent within that period.
Filtering Documents

Document details and history

Tap any document in the Documents screen to view the following details:

  • Basic info: Displays essential information such as document ID, status, sent by, sent on, last activity, expiration date, auto reminders, and file names.
  • Recipients: Shows recipient details including names, emails, last activity, and authentication type.
  • History: Provides a history of actions performed by each recipient.

Drafts

Drafts are useful when you want to save your progress on a document and continue working on it later. Documents saved as drafts can be found on the Drafts screen. You can further edit these drafts and then send them for signature.

To access the Drafts screen, open the Documents. screen and tap My Documents in the app bar. The Drafts option will then be displayed.

Trash

When you delete a document, it is initially moved to the trash folder for temporary storage. Deleted documents remain in the trash for 30 days before being permanently removed from the app. After 30 days, the document is permanently deleted and cannot be retrieved. While a document is in the trash, you can view, download, delete, or restore it.

To access the Trash screen, open the Documents screen and tap My Documents in the app bar. The Trash option will then be displayed.

Logging out of the app

To log out of your account in the mobile app, navigate to the Profile screen. At the bottom of the screen, you will find the Logout button. Tap it to log out of your account. If you want to log in with a different account, you can do so after logging out.
Logout Option in Profile Screen

Conclusion

We hope this guide helps you perform basic actions in the BoldSign mobile app. There’s so much more you can do, so explore the app today by installing it on your iOS or Android device and share your thoughts with us. Your feedback is invaluable in improving the BoldSign mobile experience.

For more details about the BoldSign mobile app, please refer to our documentation. If you have any queries, feedback, or issues, feel free to reach out to us at support@boldsign.com.

Picture of Jayavigneshwaran

Jayavigneshwaran

Jayavigneshwaran is a Product Manager at BoldSign. He is passionate about Web technologies and the Flutter framework. In addition to his technical expertise, he is currently exploring various strategies related to SEO and marketing.

Share this blog

Picture of Jayavigneshwaran

Jayavigneshwaran

Jayavigneshwaran is a Product Manager at BoldSign. He is passionate about Web technologies and the Flutter framework. In addition to his technical expertise, he is currently exploring various strategies related to SEO and marketing.

Subscribe RSS feed

Leave a Reply

Your email address will not be published. Required fields are marked *