The BoldSign mobile app is now available. Visitthis link for more details and give it a try!

The BoldSign mobile app is now available. Visitthis link for more details and give it a try!

Request Demo

Features

Explore the BoldSign features that make eSigning easier.
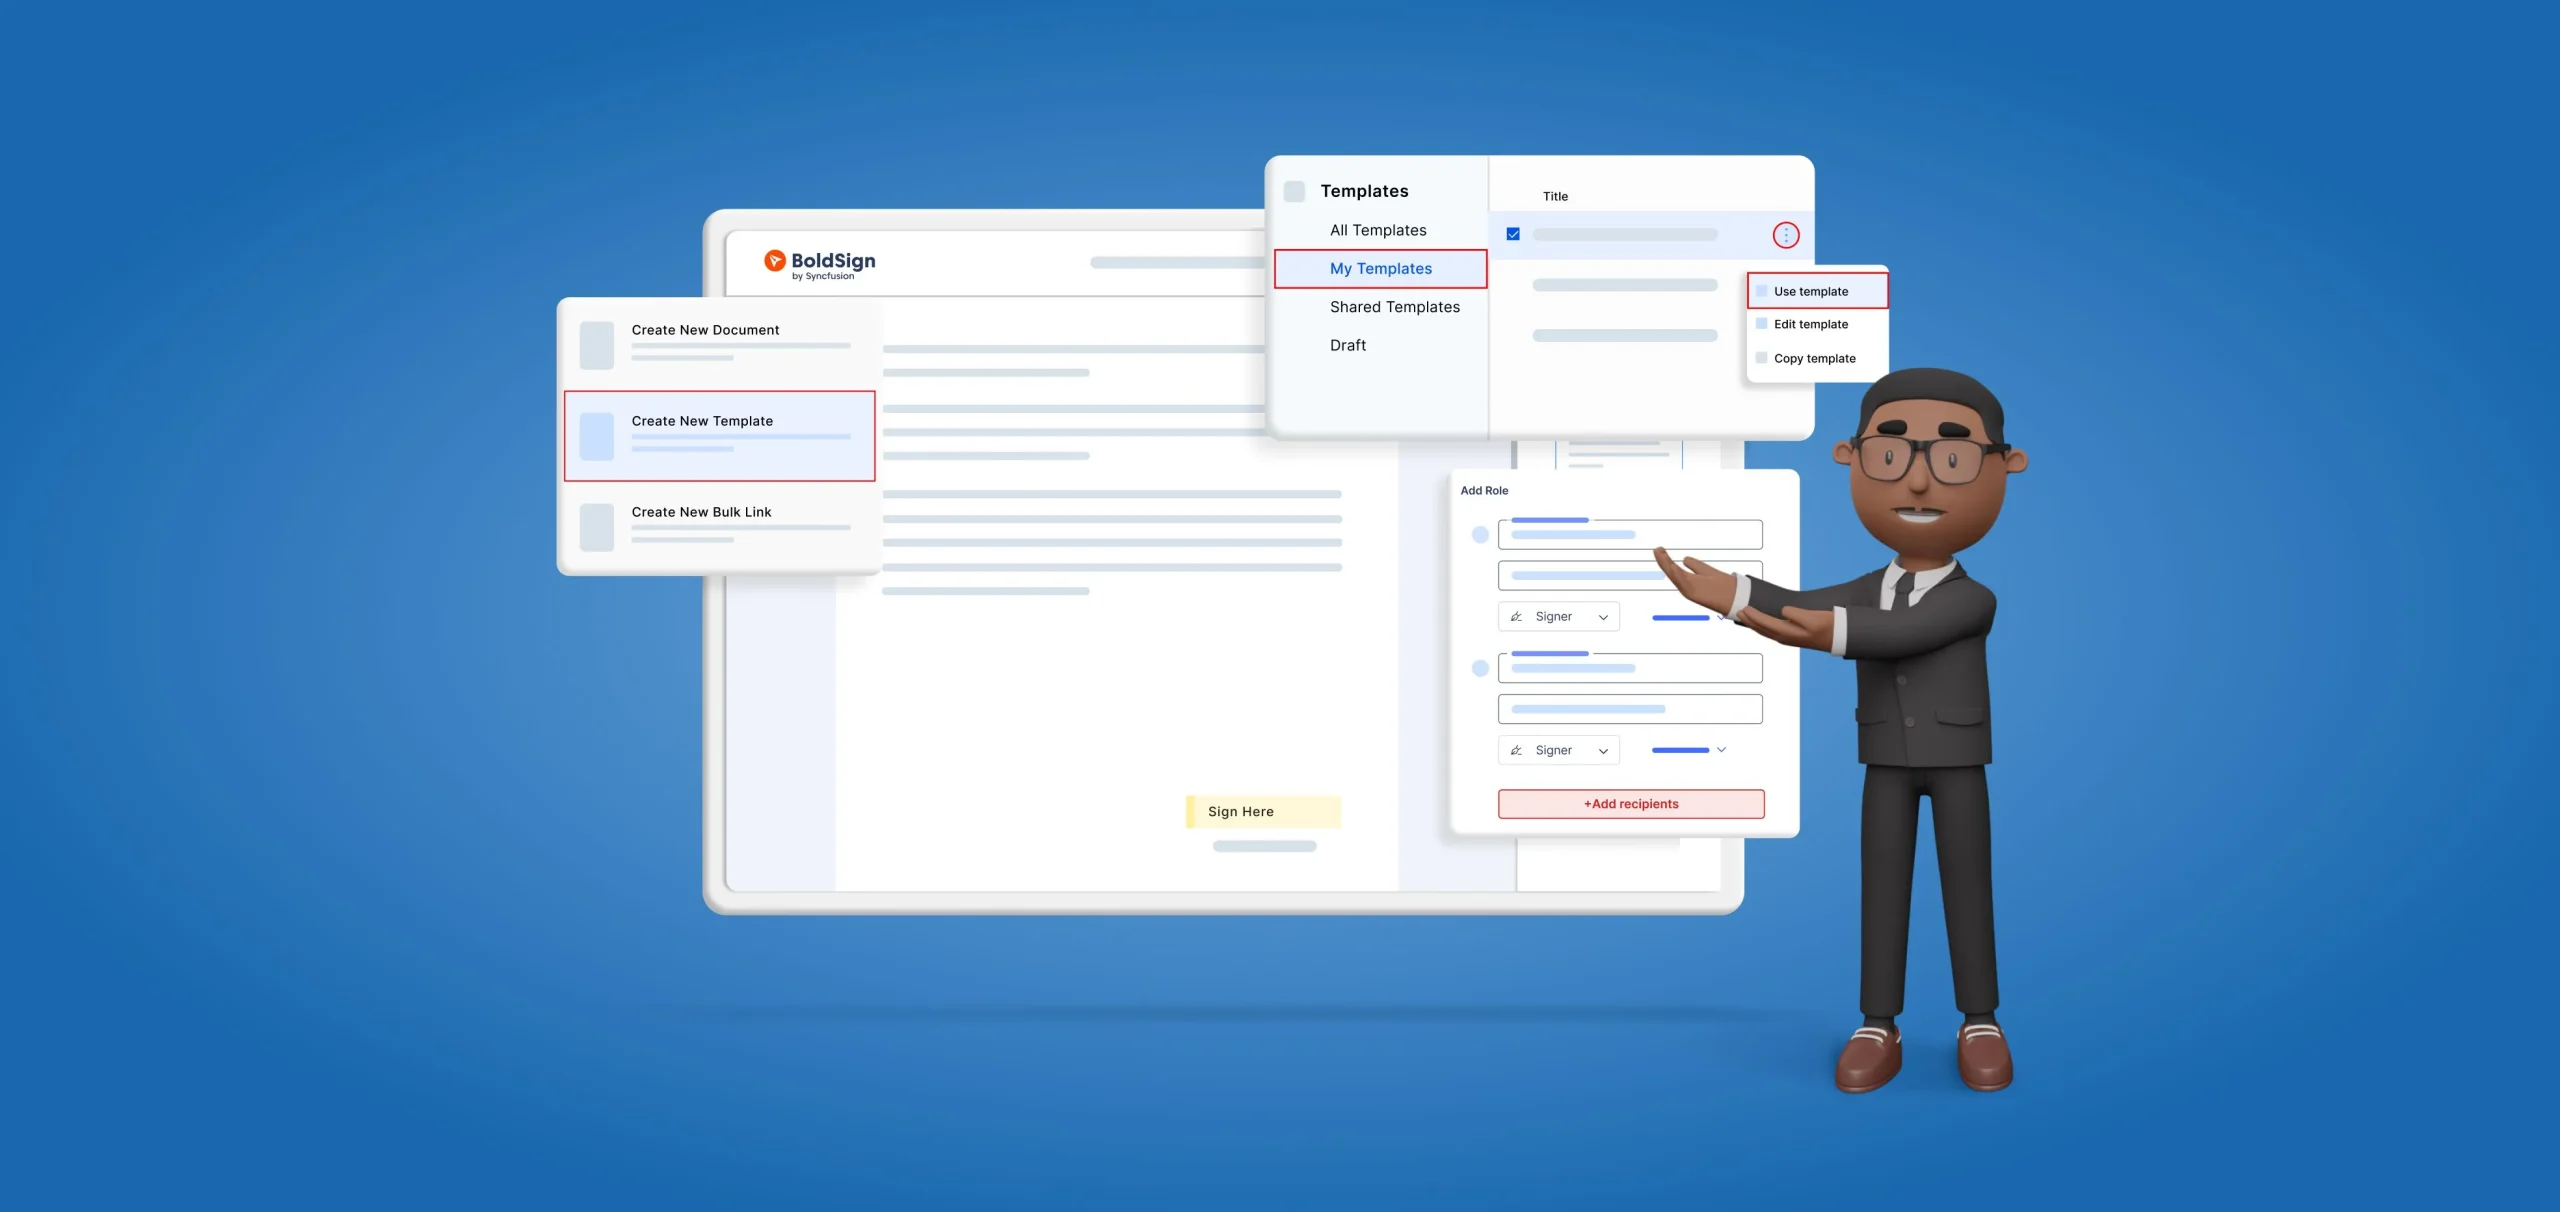
How to save time by using templates in BoldSign banner image

How to Save Time with Electronic Signature Templates

Electronic signatures have revolutionized the speed at which contracts and agreements are finalized. However, when dealing with repetitive documents, the eSignature process can be further expedited using templates. Turn your frequently used contracts into templates to save time on uploading files and configuring fields.

Consider a scenario where a Human Resources department frequently needs to send employment contracts to new hires. Creating a document from scratch each time for this process can be time-consuming and error prone. However, by using the templates feature in BoldSign, the HR team can create a standardized template for employment contracts.

Whenever the HR department needs to send an employment contract, they can simply utilize the pre-configured template. This approach not only saves time but also ensures consistency across all employment contracts, contributing to a more efficient and error-free workflow in the onboarding process for new hires.

In this guide, we will explore how the templates will save your time and streamline your business processes.

Create a template

Templates are created in the same way as regular documents, but instead of associating signature fields with people, we simply associate fields with roles. A role is simply a placeholder for a real person.

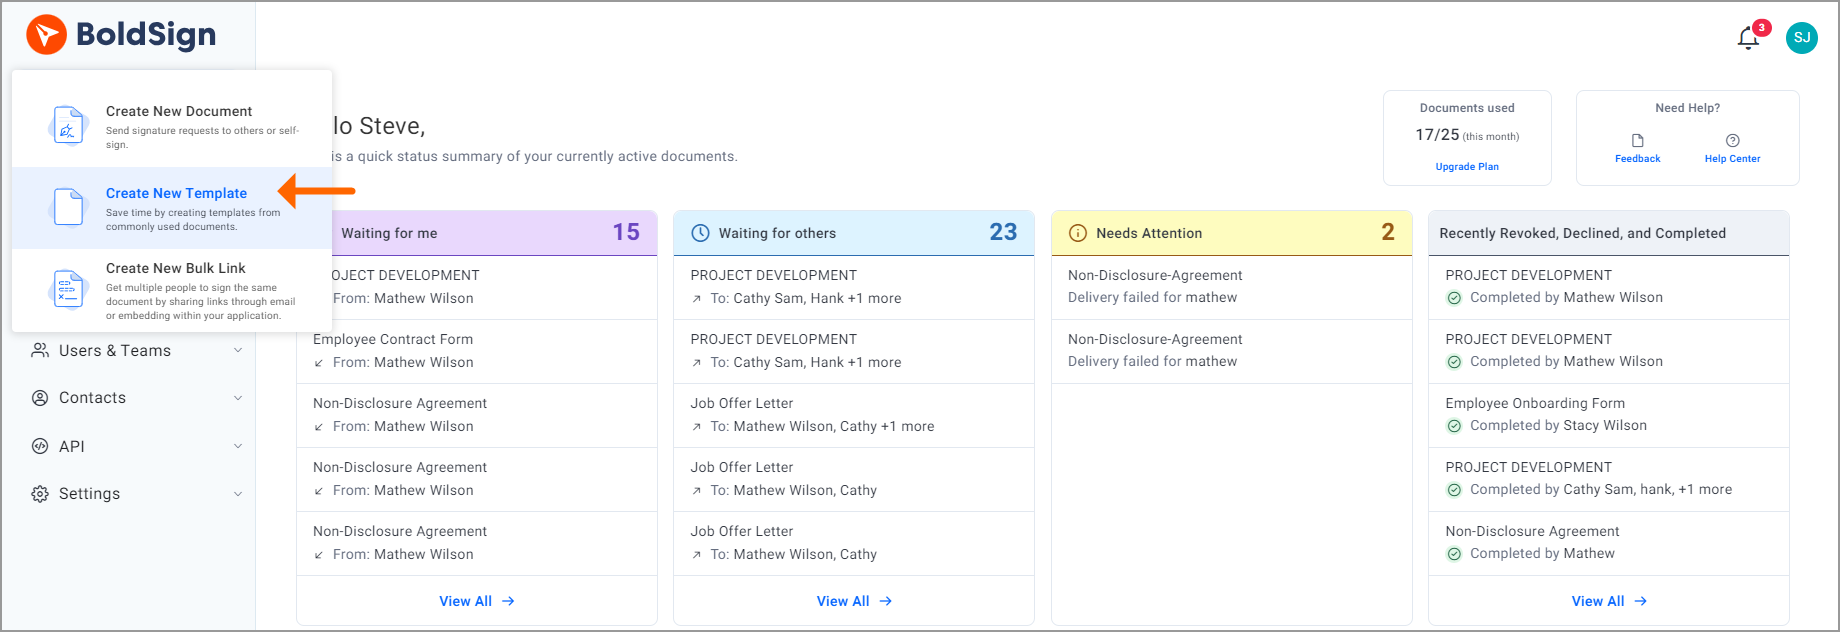
In the BoldSign web application, begin the new template creation process.

Template creation
Create a template
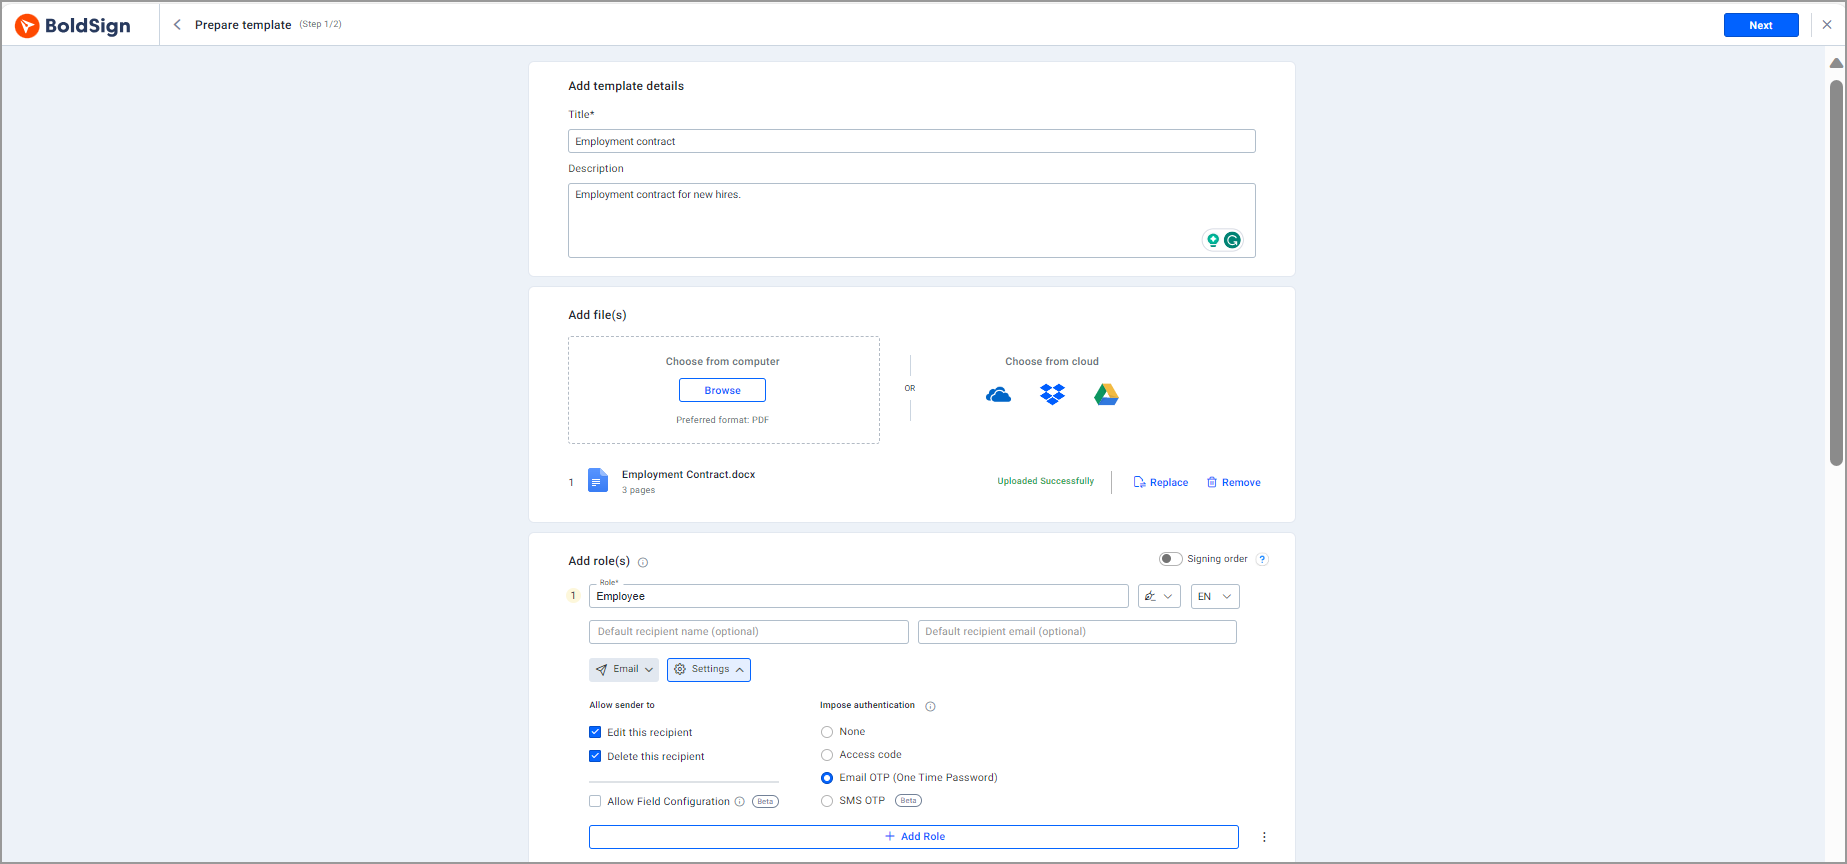
On the Prepare template page, you will find options such as Title, Description, Add files, etc. Enter the title and description in the respective fields, and then add the file(s) for which you want to obtain a signature in the Add file(s) section.
Next, enter the role in the Add role(s) section. You can enter the recipient details either immediately or later when using the template for a signature request.

Beneath the recipient details column, you will find a dropdown menu to select the delivery option. The default mode is Email, but if needed, you can switch to SMS or Email & SMS.

In the Settings dropdown, you can enable/disable the options for Edit/Delete recipients. Additionally, you can enable authentication for the signers. Choose from three authentication methods based on your preference, and the signers will receive a code to access the document according to your selection.
Add role
Add role option
Then, enter the CC details, Document message, toggle the Allow signers to re-assign option based on your needs and click Next to proceed to the Configure fields page.
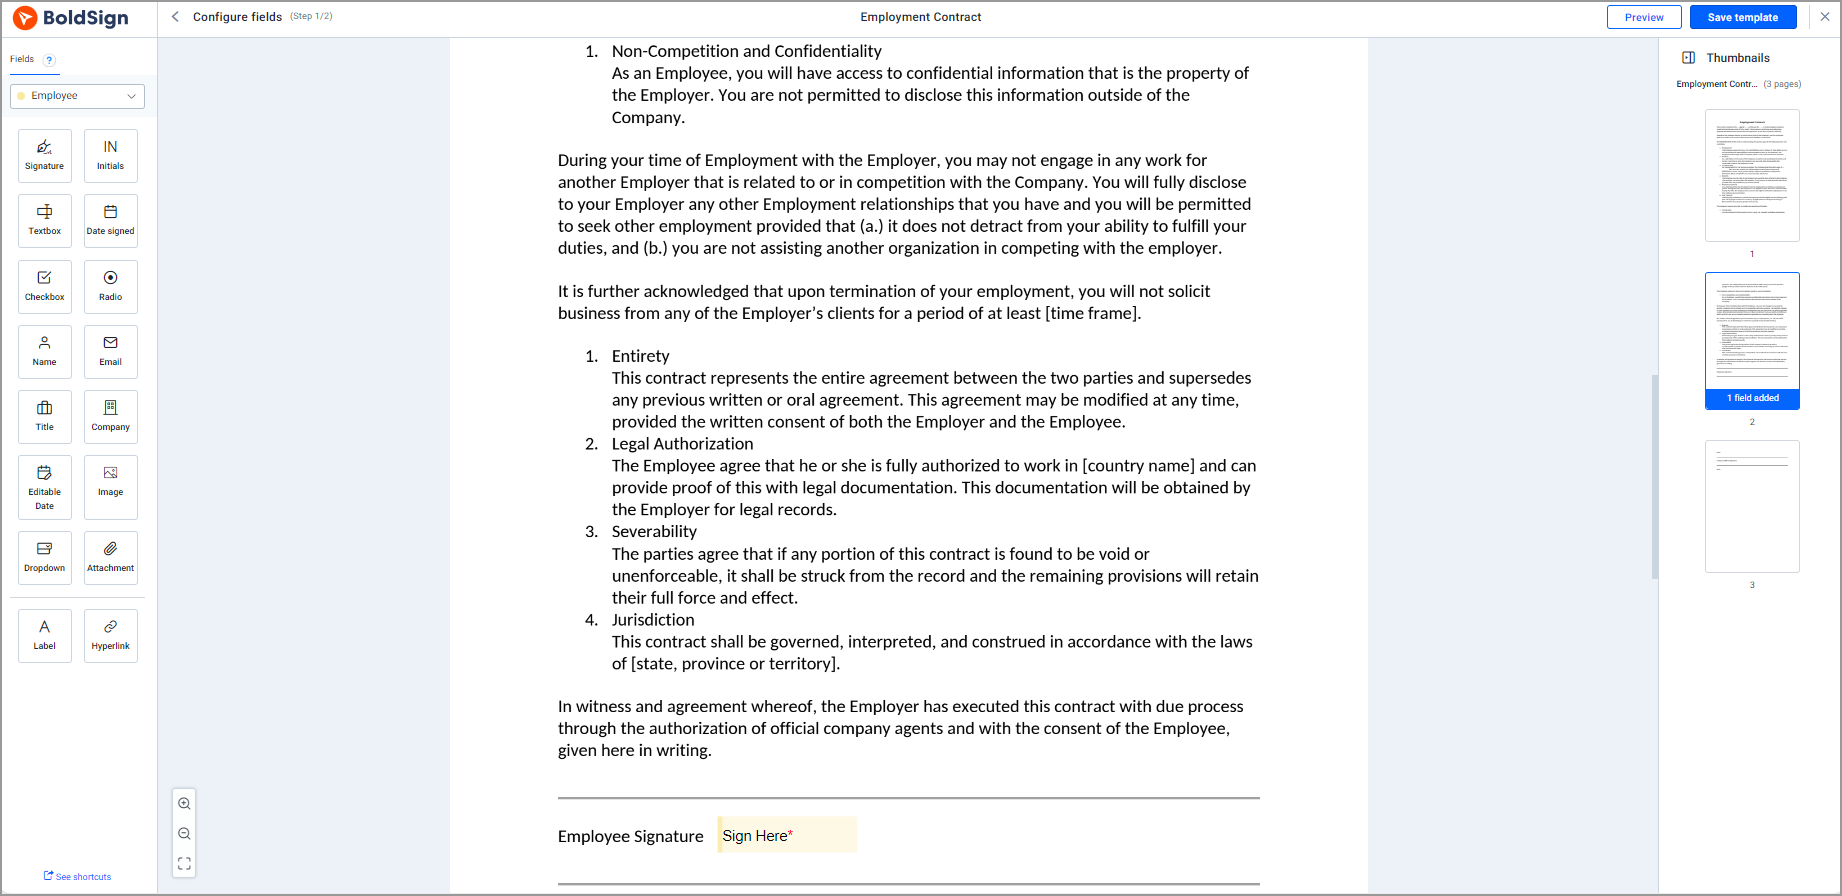
On the Configure fields page, drag and drop the necessary form fields. You can also create templates without adding form fields. However, they must be added while using the template.
Configure field
Configure field

Once done, save the template. A dialog box will prompt you with options to use the template now or later. Choose the desired option. If you select the “Use template” option, you will be taken to the Prepare Template page, where you can fill in recipient details and send it for signature request. If you choose “Not Now”, you will be directed to the Dashboard page.

Use a template

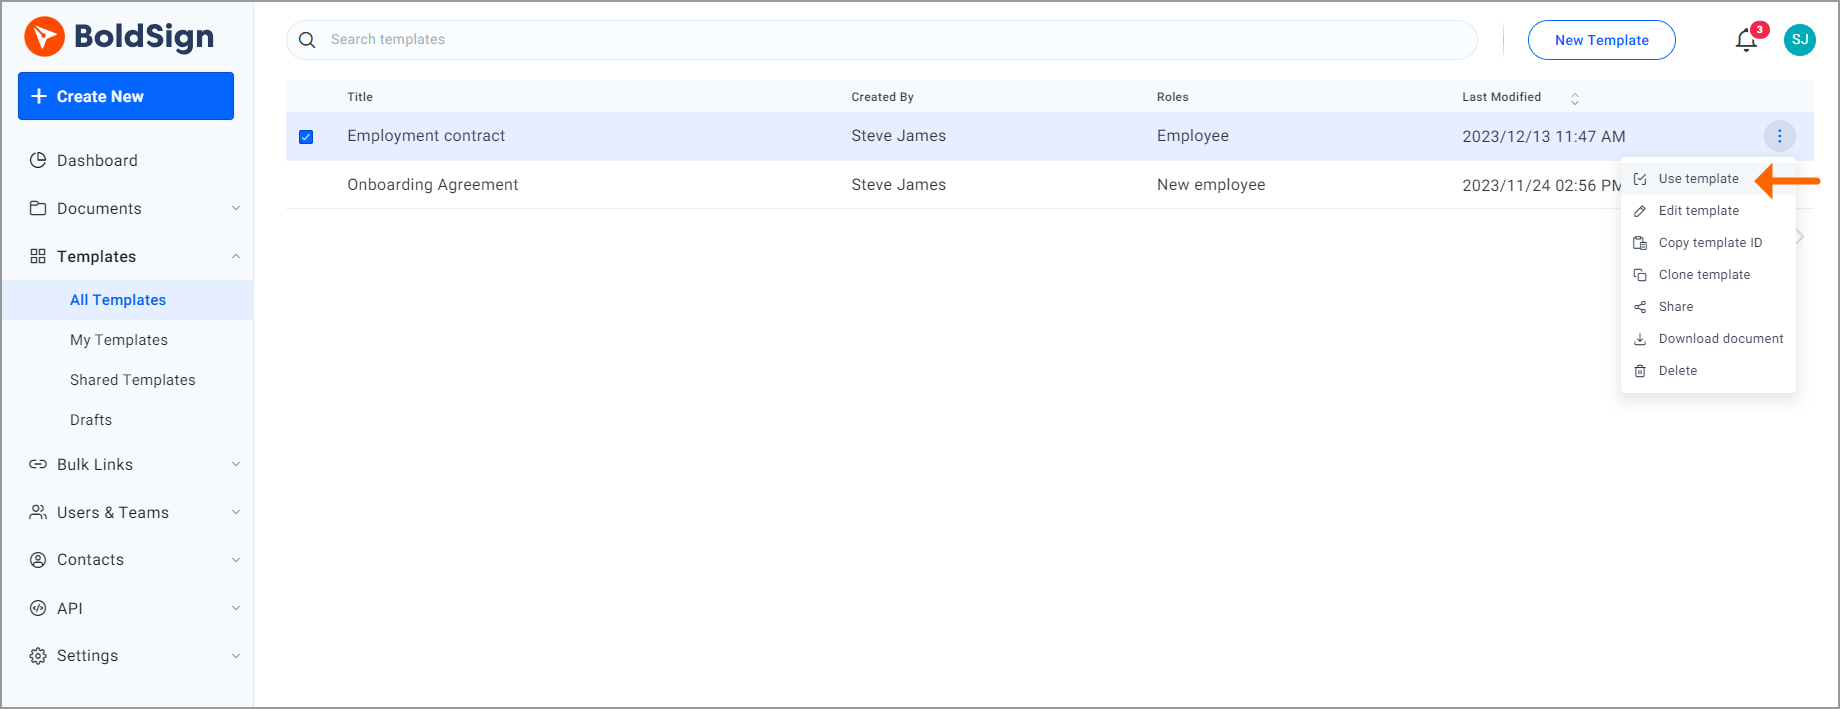
Once a template is created, you can find it listed under My Templates. To utilize the template for sending a signature request, click on the context menu at the right end of the specific template and choose the Use template option.
My template
Use a template

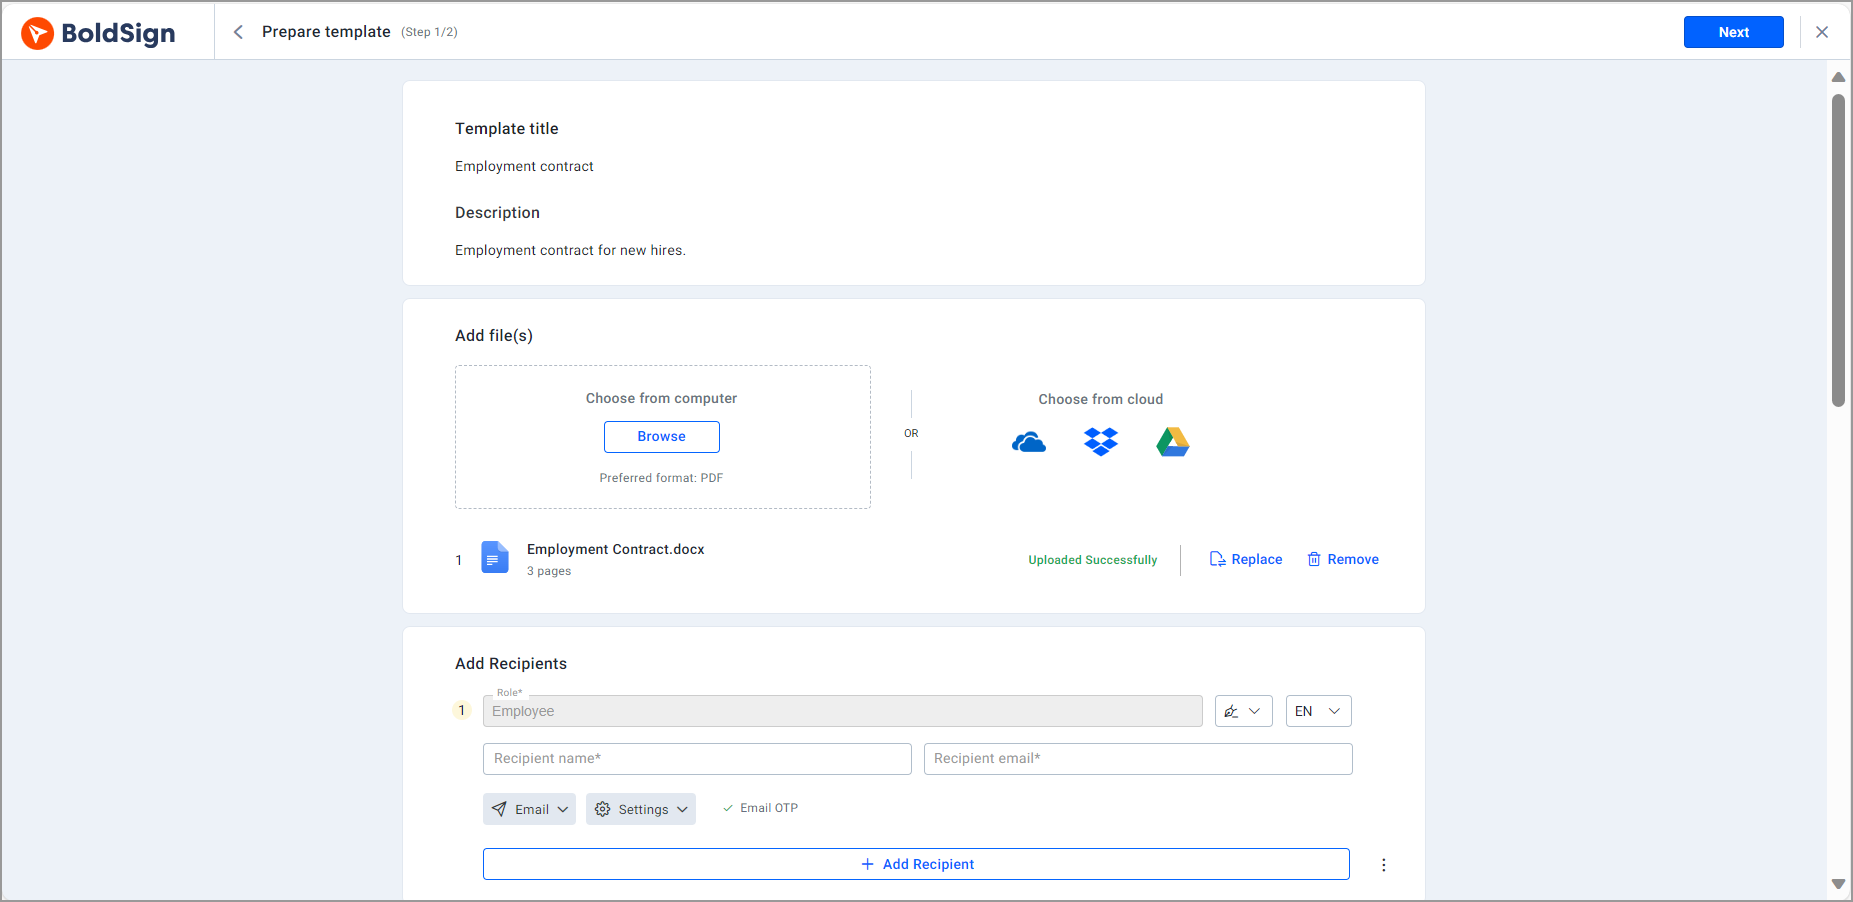
You will be taken to the Prepare template page, where you will find the pre-filled information, you specified during template creation. Here, you can add or remove files, include recipients, and make changes to document settings if necessary.

Add file
Add or remove field option

Then, move to the Configure fields page. Add or remove form fields according to your requirements and send the signature request.

Merge and use template

If you need to send multiple templates to a recipient but prefer to deliver them as a unified document rather than sending each template separately, you can use the merge templates feature. This functionality allows you to combine the individual templates into a single comprehensive document, simplifying the process and ensuring that the recipient receives a consolidated file.

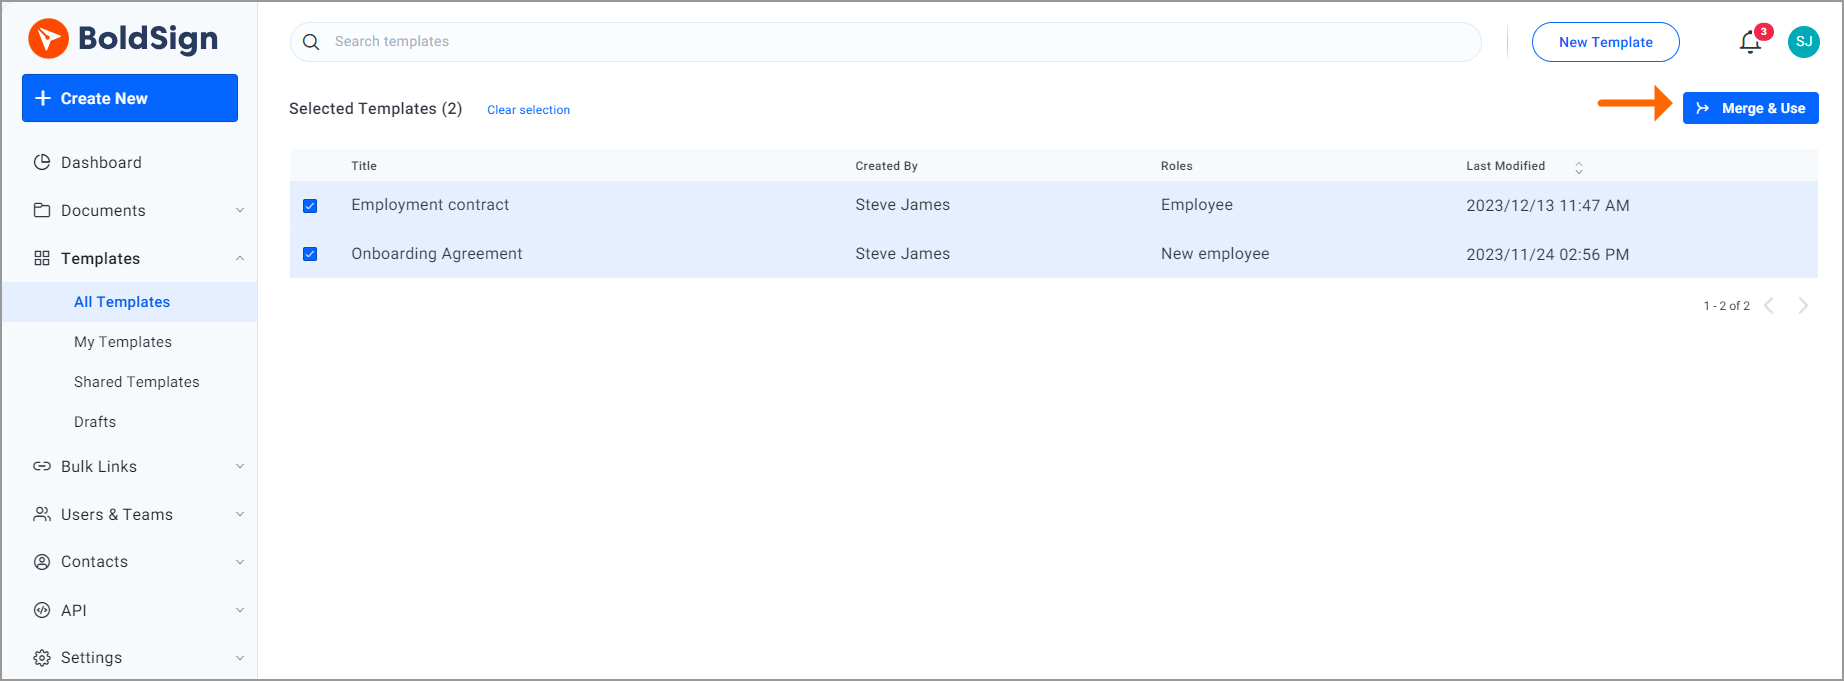
Select two or more templates using the checkbox, and the Merge & Use option will appear. Upon clicking it, you will be directed to the Prepare document page, where you can see the details specified in both templates. Make necessary changes and move next.

On the Configure fields page, you will find the documents attached to the templates one below the other. Add or remove form fields as necessary and proceed to send the document for signature.

Merge template
Merge and use template option

Share a template

Users have the flexibility to share templates with any team, fostering collaboration and maintaining uniformity in document creation across various projects.

To share the template with other teams, click the context menu at the right-end of the template and select the Share option.

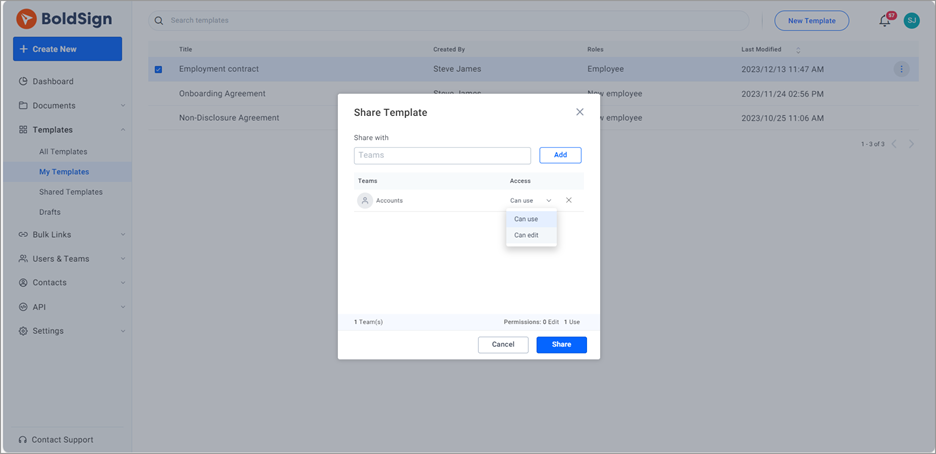
A dialog box will appear. In the Share with field, select the team to which you want to share the template and click “Add”.

Under the access column, you will find the options “Can use” and “Can edit”.

If you want to allow recipients to edit the template, choose Can Edit option. This enables the user to modify all details associated with the template. After completion, the user can save the template, and the changes will be visible to everyone with access to this template.

If you select the “Can Use” option, the user cannot modify the template.

After selecting the option, click Share, and the template will be shared with the specific team.
Share template
Share a template

Conclusion

We sincerely appreciate your time spent exploring the powerful capabilities of templates in BoldSign. Seize the opportunity to experience the time-saving advantages firsthand by initiating your 30-day free trial. Witness the seamless efficiency of document management with BoldSign.
Your feedback is appreciated. Share your thoughts and experiences in the comments section below. Whether you have questions, suggestions, or an eagerness to delve deeper into what BoldSign offers, our dedicated support team is ready to assist you. Schedule a personalized demo or connect with us through our support portal.
Picture of Lakshmi Priya Soundar Rajan

Lakshmi Priya Soundar Rajan

Lakshmi Priya Soundar Rajan is a Technical Writer at BoldSign. With expertise in simplifying complex concepts, she contributes to the comprehensive documentation and user-friendly content at BoldSign. Lakshmi's commitment to quality ensures users have access to clear and helpful information.

Share this blog

Picture of Lakshmi Priya Soundar Rajan

Lakshmi Priya Soundar Rajan

Lakshmi Priya Soundar Rajan is a Technical Writer at BoldSign. With expertise in simplifying complex concepts, she contributes to the comprehensive documentation and user-friendly content at BoldSign. Lakshmi's commitment to quality ensures users have access to clear and helpful information.

Subscribe RSS feed

Leave a Reply

Your email address will not be published. Required fields are marked *