The BoldSign mobile app is now available. Visitthis link for more details and give it a try!

The BoldSign mobile app is now available. Visitthis link for more details and give it a try!

Request Demo

Features

Explore the BoldSign features that make eSigning easier.

Exploring the Signer Authentication Methods of BoldSign Banner Image

Exploring the Signer Authentication Methods of BoldSign

Signer authentication is the process of verifying the identity of the signer. It is like double-checking whether the person signing the document is correct for the task. This additional layer significantly enhances the security of the document. While authentication may not be mandatory for every document, it becomes essential for highly sensitive and important ones.

In BoldSign, configuring signer authentication is a direct process that can be undertaken during the preparation of the signature request or even after the request has been created. The following sections of this blog will provide a detailed explanation of signer authentication in BoldSign.

Signer Authentication Methods

BoldSign provides three options for signer authentication: 

  1. Email OTP

  2. SMS OTP

  3. Access Code

Email OTP involves sending an automatically generated code to the recipient’s email address, ensuring a secure verification process. Similarly, SMS OTP sends an auto-generated code to the recipient’s phone number for authentication. On the other hand, the Access Code method differs in that the sender creates a specific access code during the signature request setup, which must be personally conveyed to the signer for them to access the document.

Understanding the distinctions between these authentication methods and selecting the most suitable one for each signer helps for a better signing experience.

Adding Authentication During Signature Request Creation

To add authentication while creating a signature request in BoldSign, follow these steps:

  1. Click the "Create New"and select "Create New Document" to initiate the signature request creation process.

  2. Add the necessary attachments to the document and input recipient details.

  3. Below each recipient, find the "Settings" options where you can enable the authentication method.

  4. Once enabled, all three authentication methods (Email OTP, Access Code, and SMS OTP) will be displayed.

    Add authentication during signature request
    Add authentication during signature request
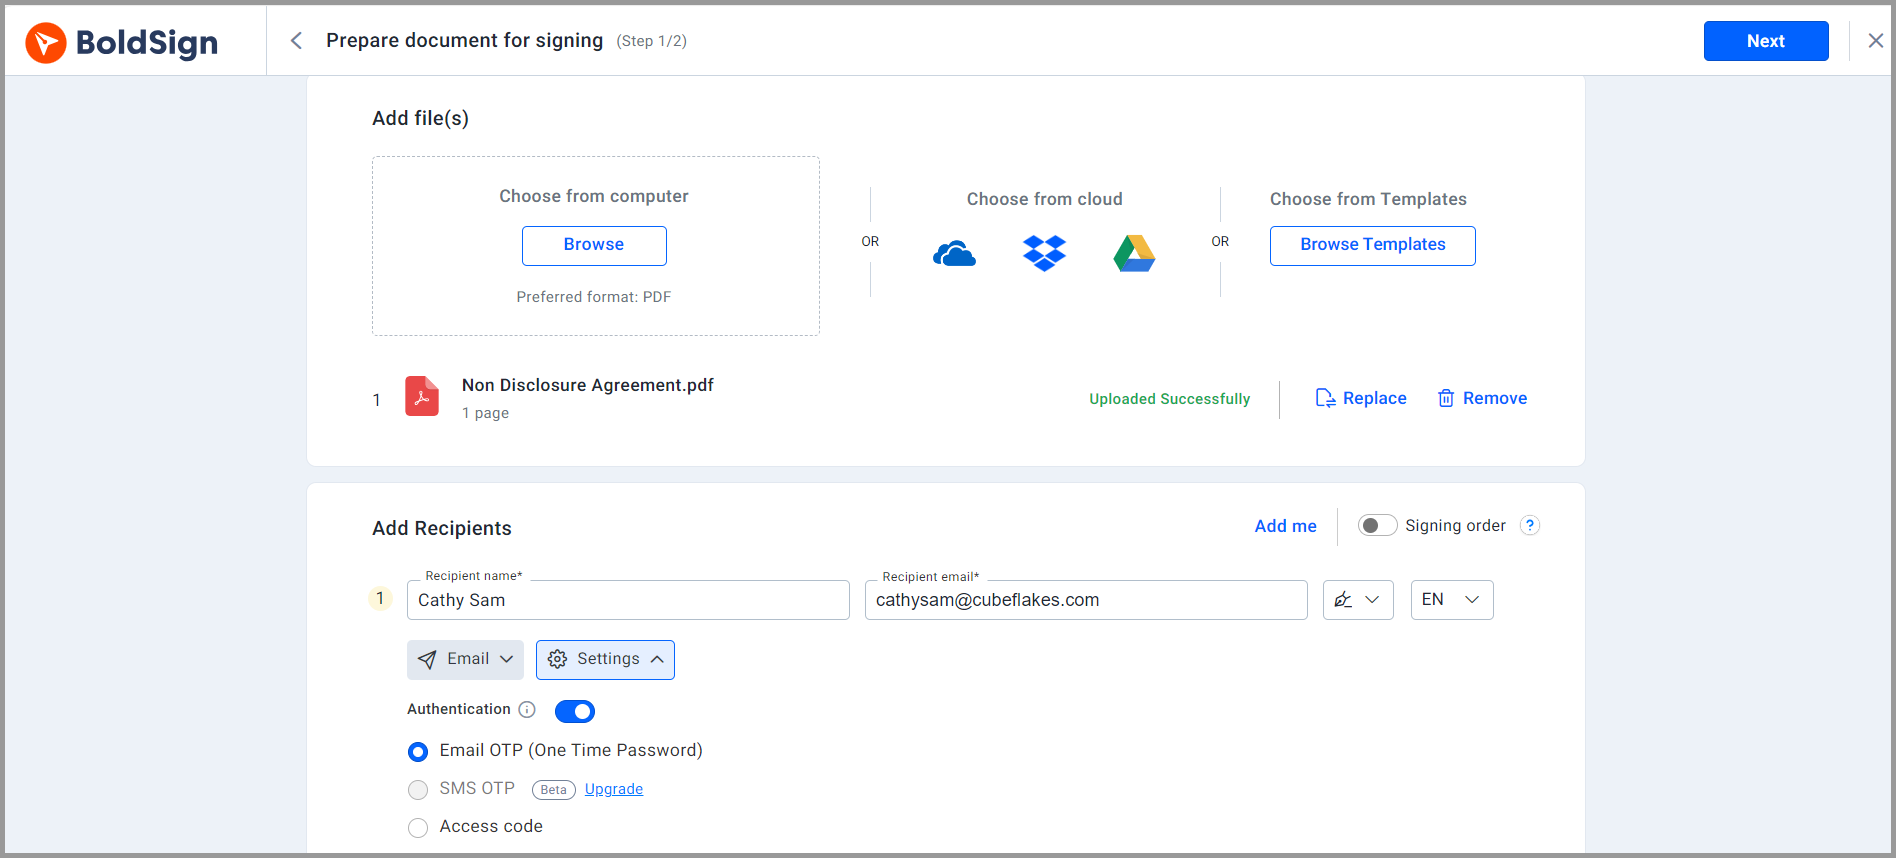
  5. For Email OTP, enable it with a single click. The system automatically takes the recipient's email and sends an OTP directly to that email.

  6. Access Code is straightforward. When enabled, the sender must enter a code, which must be personally conveyed to the signer.

  7. For SMS OTP, note that this authentication method is more complex and is available only for paid users. If you're using a free plan, an upgrade to a higher plan is required.

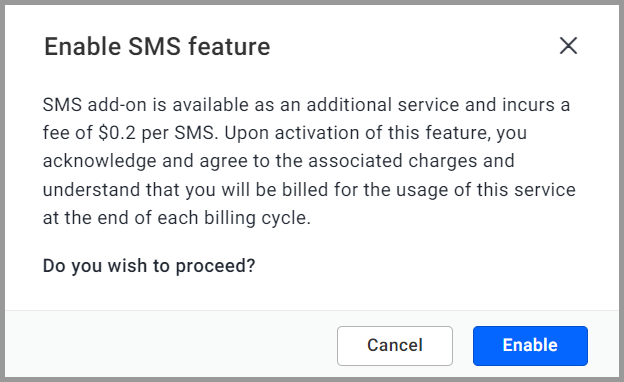
  8. After upgrading the plan, the "Activate" option will become visible. Click on it, and a confirmation dialog box will appear.

  9. Read the information in the dialog box, which incurs a fee of $0.2 per SMS. This fee will be charged along with your billing cycle. Click the 'Enable' button to activate the SMS OTP feature.

    Enable SMS features
    Enable SMS features
  10. You can select the SMS OTP option once the SMS OTP feature is enabled. Provide the signer's phone number and select the country code.

    Enable sms OTP feature
    Enable sms OTP feature
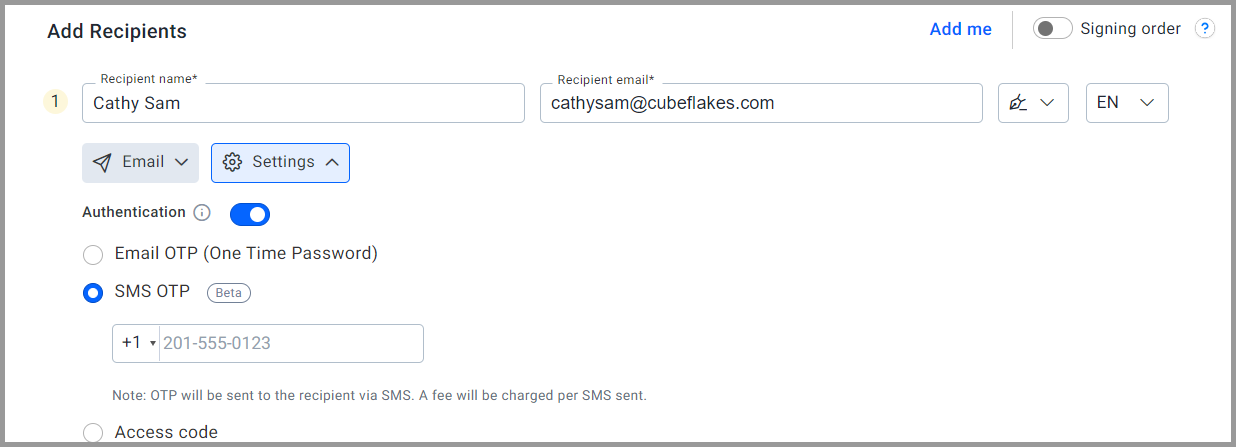
  11. Upon opening the document, the signer will receive an OTP on the added phone number for authentication.

By following these steps, you can seamlessly integrate different authentication methods based on your needs and plan type in BoldSign.

Adding Authentication to Sent Documents

In cases where you’ve already sent a signature request but wish to add authentication before the recipient signs the document, BoldSign offers a solution.

Follow these steps to add authentication after sending a document:

  1. Navigate to the "My Documents" page and locate the specific document you want to add authentication to.

  2. Click on the document to access its overview page.

    Document Overview
    Document Overview
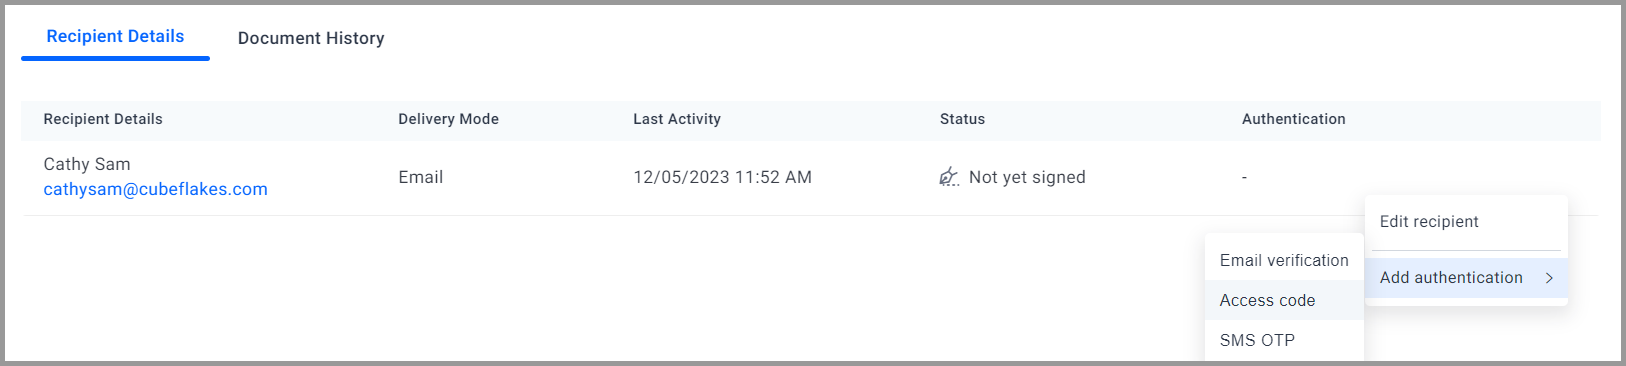
  3. In the recipient details section, you'll find details about the recipients. Hover over the recipient for whom you want to add authentication.

  4. Look for the "Add Authentication" option in the context menu that appears.

  5. Click on the "Add Authentication" option to configure and add the desired authentication method for the selected signer.

    Add authentication
    Add authentication

By following these steps, you can enhance the security of your signature request by incorporating authentication even after the document has been initially sent, provided that the recipient has not yet signed the document.

Editing Authentication for Sent Documents

At times, we may need to change the authentication type for signers in BoldSign for various reasons. BoldSign makes this process easy, allowing you to switch the authentication for signers even after a document has been sent.

When you need to change the authentication type in BoldSign, follow these steps:

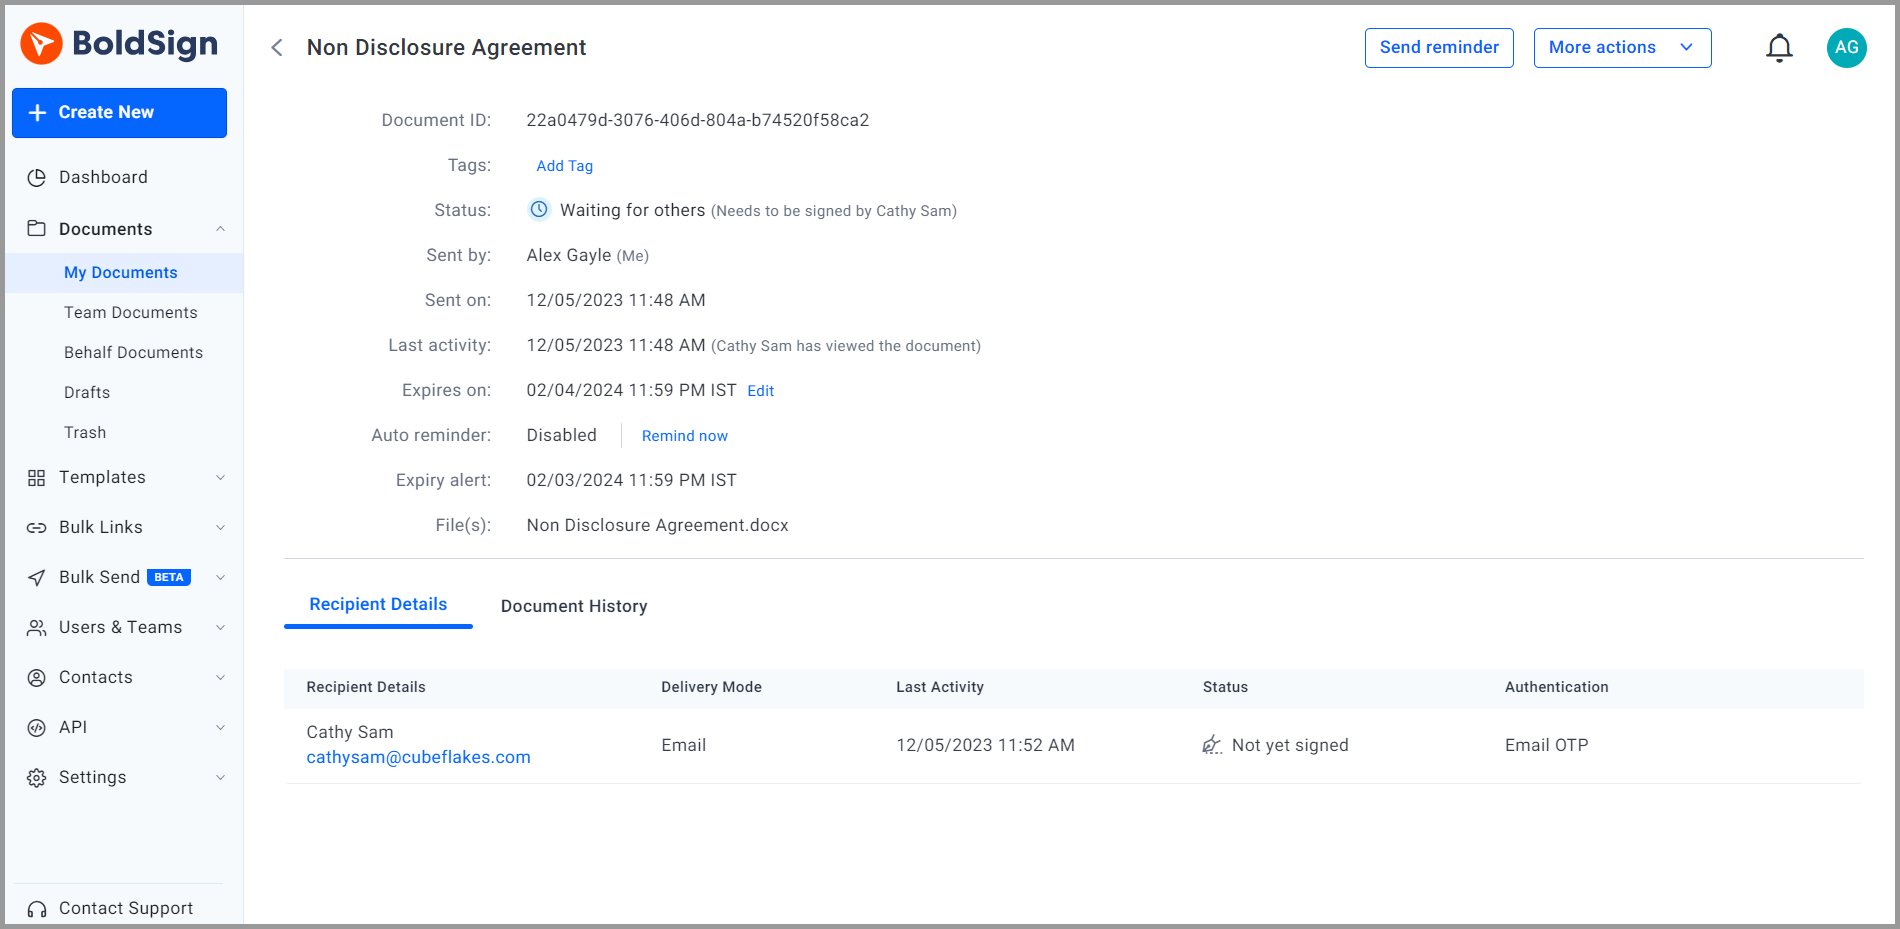
  1. Head to "My Documents" and click on the document you want to modify the authentication type. This action will take you to the document's overview page.

  2. Scroll down to the bottom of the overview page to locate "Recipient Details."

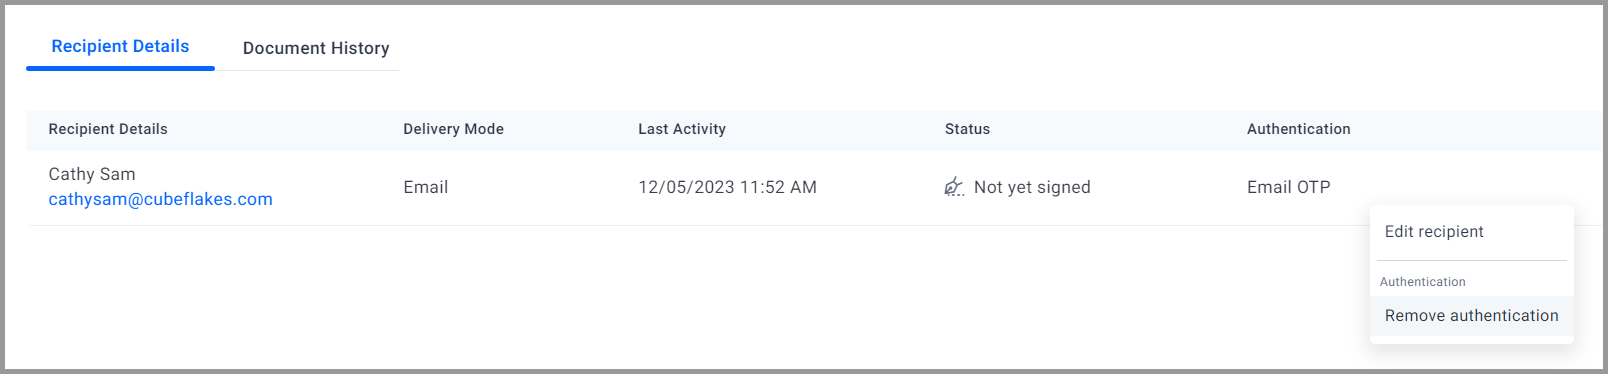
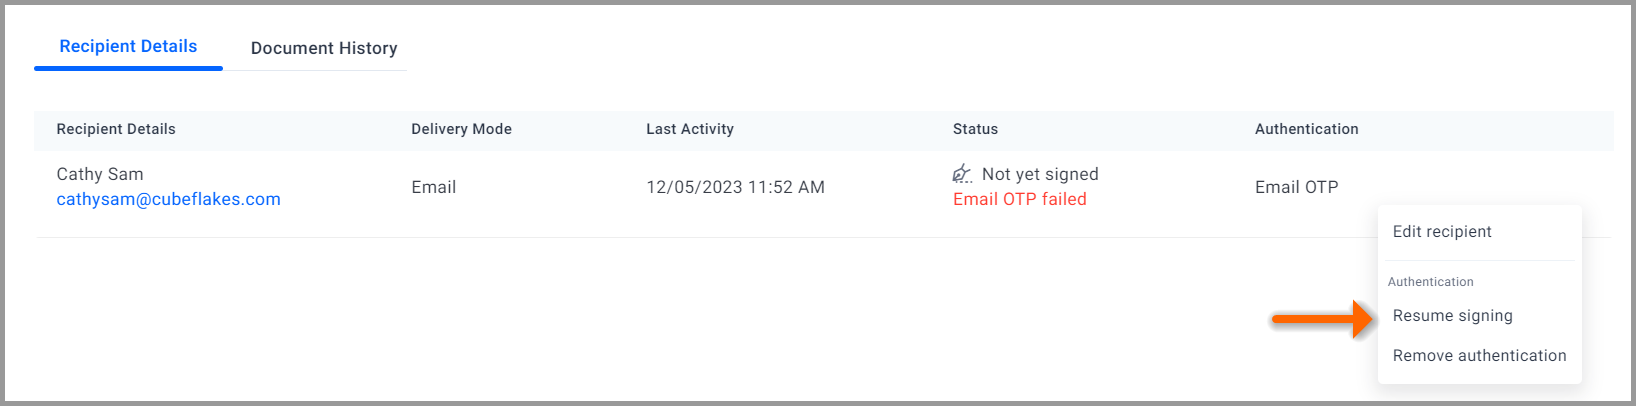
  3. In the "Recipient Details" section, note the current authentication type assigned to the recipient.

  4. To change the current authentication type, choose the "Remove authentication" option from the context menu.

    Remove authentication
    Remove authentication
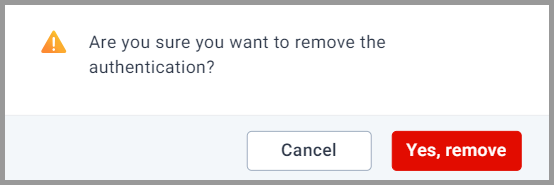
  5. A confirmation pop-up will appear; click "Yes, remove" to proceed.

    Choose remove authentication
    Choose remove authentication
  6. After successfully removing the authentication, select the "Add authentication" option from the context menu.

  7. The available authentication types will be displayed. Choose the required option, and the authentication type will be updated successfully.

By following these steps, you can easily switch the authentication type for a document in BoldSign.

How does the Signer Authentication Works

When signer authentication is added to a document, it undergoes additional security measures for heightened protection. Let’s explore how this works: if an email OTP is enabled when the signer opens the document for signing by clicking “Review and Sign,” an OTP is promptly sent to the email. Once the OTP is entered, the document unlocks. Similarly, with SMS OTP, instead of email, the system instantly dispatches an OTP to the registered phone number provided by the sender. Only by entering this OTP can the signer access the document. The access code, designed for highly confidential documents, involves the generation of a secret code by the sender. This code is then personally conveyed to the signer and serves as the exclusive means for accessing the documents.

What Happens When a Document is Locked

The document is automatically locked if a signer enters the wrong authentication for more than three attempts. This applies to all three authentication types, and the signer cannot proceed with signing unless the sender resumes the process on the “My Documents” page. The sender will receive a notification of the failed authentication, and the document status will be changed to “Needs Attention.”

Document locked

The sender must follow these steps to resume signing:

  1. Navigate to the "My Documents" page and select the specific document.

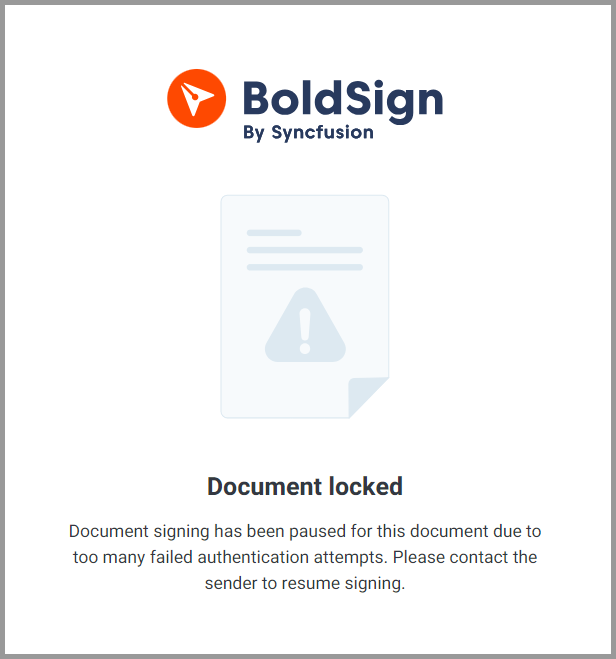
  2. You will be directed to the Overview page. Click on the context menu at the right end of the "Recipient Details" section and choose the "Resume Signing" option.

    Resume signing
    Resume signing
  3. A pop-up message will be displayed, indicating that the document has been successfully unlocked.

  4. Subsequently, the signer will receive OTPs when they open the document, and the signing process can continue.

Conclusion

Thank you for reading! I hope now you have understood the importance and types of signer authentication in BoldSign. Consider adding effective signer authentication methods to enhance the security of your documents.

Also do check out our video tutorial in YouTube on signer authentication for more information: Manage signer authentication.

We value your feedback, so please share your comments below. If you need further assistance, you can schedule a demo or contact our support team through our support portal.
Picture of Caroline Dolly

Caroline Dolly

Caroline Dolly, a technical writer at BoldSign, excels at translating intricate concepts into explicit and engaging content across various formats, including video tutorials, help articles, and comprehensive documentation. Her proficiency in both language and technology ensures that information is accessible and comprehensible for diverse audiences.

Share this blog

Picture of Caroline Dolly

Caroline Dolly

Caroline Dolly, a technical writer at BoldSign, excels at translating intricate concepts into explicit and engaging content across various formats, including video tutorials, help articles, and comprehensive documentation. Her proficiency in both language and technology ensures that information is accessible and comprehensible for diverse audiences.

Subscribe RSS feed

Leave a Reply

Your email address will not be published. Required fields are marked *