In this blog, we are going to see how to speed up the process of building a contract by using custom form fields. Custom form fields are preconfigured fields where values and formatting are already applied. This means that commonly used fields can be saved with specific settings, eliminating the need to repeatedly configure them from scratch.
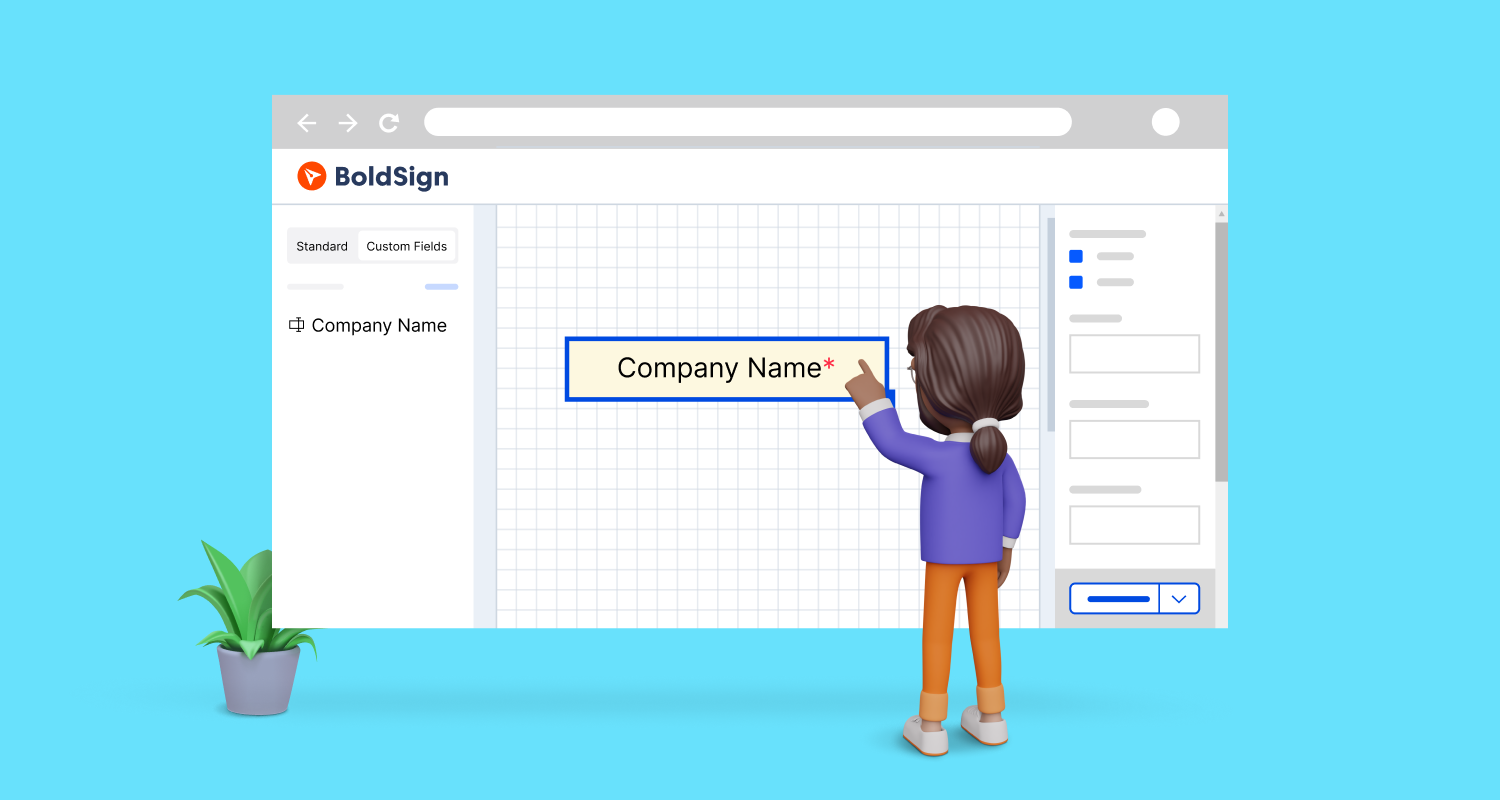
Let’s assume your document has fields like “Company Name,” “Countries,” “Business Type,” “Payment Type,” and “Company Website”. These fields can be easily set as prefilled form fields since they won’t change from document to document. So, having these fields as custom fields can improve your team’s productivity by not repeating the fields in each document. The user can just drag and drop them into the documents.
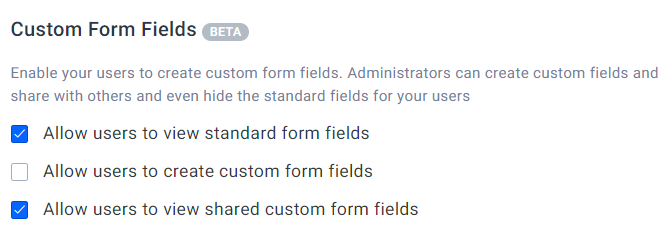
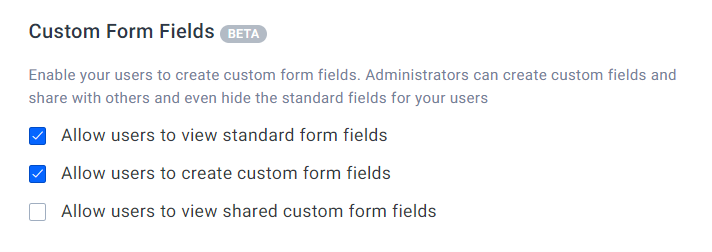
Also, admin users can enable or disable the following options for other team members to enforce a concrete workflow.
View Standard Form Fields.
View Shared Form Fields.
Create Custom Form Fields.
Create custom fields
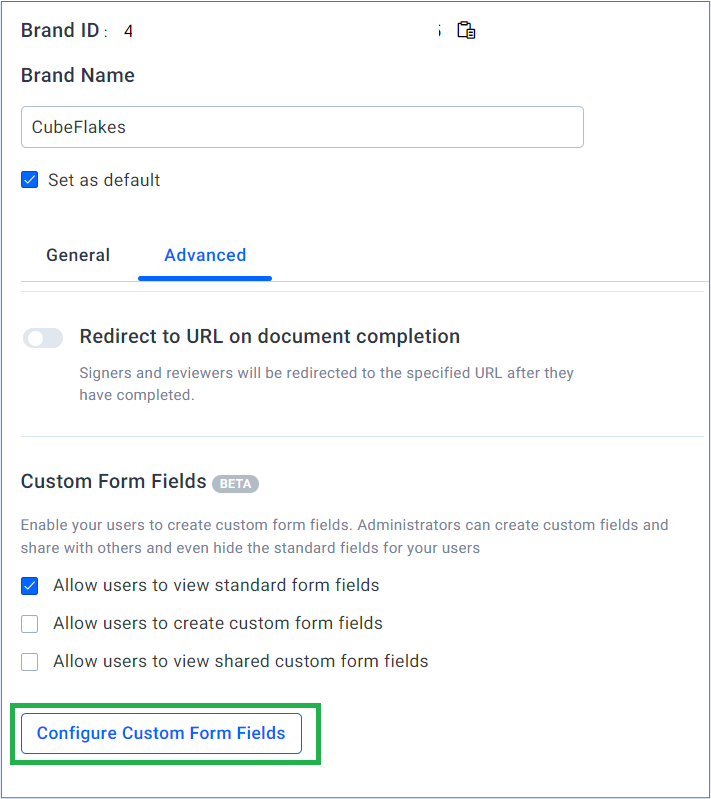
After creating a brand in BoldSign, administrators can create custom fields by following these steps:
Click on the “Configure Custom Form Fields” option, as shown in the screenshot.
Create Custom Form Fields
This action will redirect you to the “Configure Custom Field” page.
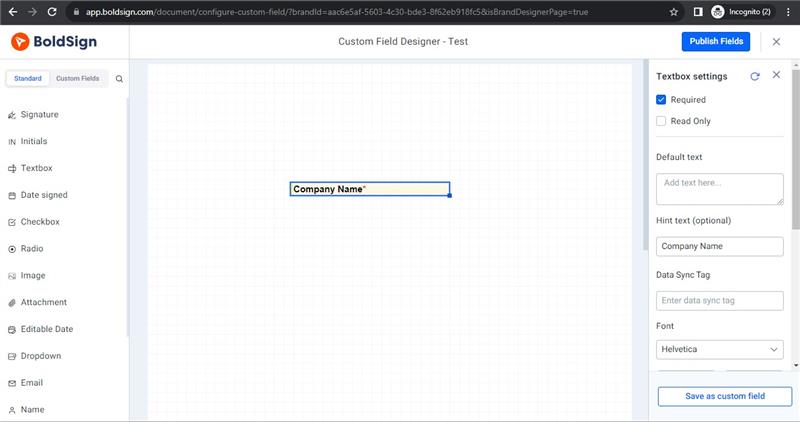
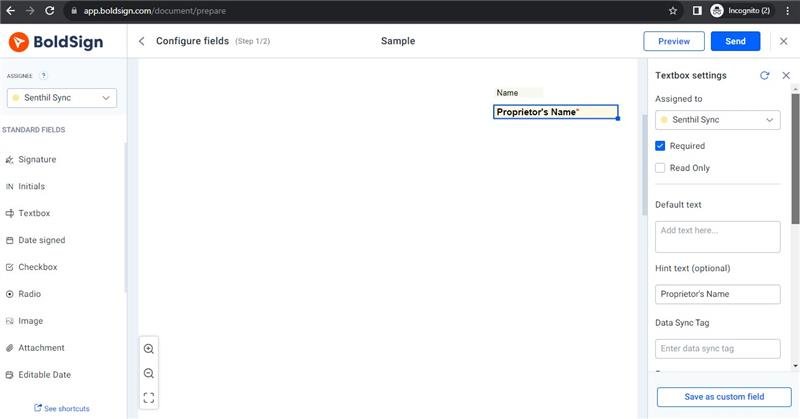
2. Here, you can drag and drop form fields from the left section and customize them further using the advanced settings, as depicted in the screenshot.
3. Once the configurations are finalized, click on the “Save Custom Field” button. Provide a field name and description (optional) to save the custom field. The added custom field will now be available in the left section, as shown in the screenshot.
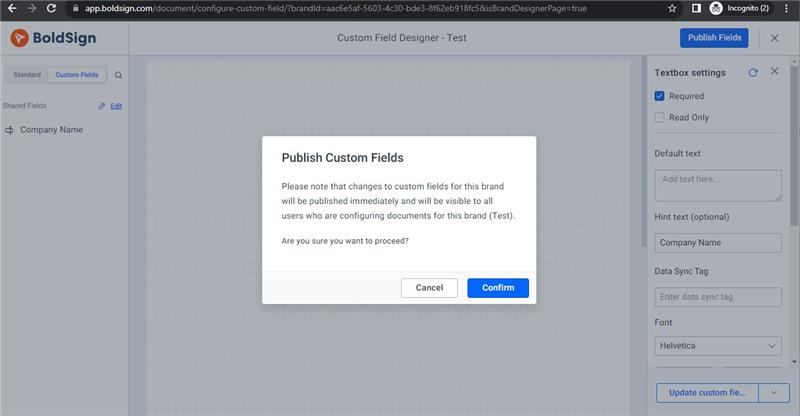
4. Finally, you can publish the custom fields by clicking on the Publish Fields button, so you can use the custom fields from the document preparation page.
Share a custom field
Once the custom field is created, it can be shared within your organization by enabling the following option. Disabling this option will hide the custom fields from other users in your organization.
Use the custom form fields
Once the custom form field is published, users can access it from the document preparation page.
Enable other members to create custom form fields
While creating or editing branding in BoldSign, you can allow users in an organization to create custom fields based on specific requirements. For that follow these steps:
5. Enable the “Allow Users to Create Custom Fields” option, as shown.
Allow Org Users to Create Custom Form Fields
6. Once this option is enabled, users will get the following option to save the custom fields from the document preparation page.
Allow Org Users to Create Custom Form Fields
Other Features
During the configuration of custom fields, BoldSign provides the following essential features too:
Rearranging the order of custom fields.
Editing an existing custom field.
Delete an existing custom field.
Reference Links
The following documentation helps you create and configure the custom form fields in detail.
BoldSign’s ability to create custom fields offers significant flexibility and customization options to branding. By following the outlined steps and leveraging the advanced features, users can create and configure custom fields tailored to their specific needs, enhancing the document creation process, and promoting efficiency within an organization.
Senthil Kumar M, who works for Syncfusion as a Product Manager. He has been actively involved in web development since 2012 and has a passion for both front-end and back-end technologies.
Share this blog
Senthil Kumar M
Senthil Kumar M, who works for Syncfusion as a Product Manager. He has been actively involved in web development since 2012 and has a passion for both front-end and back-end technologies.


Latest Articles
Demo-Rss
Mandating Signer Authentication When Making Signature Requests via API
How to Send Documents for eSignature with Identity Verification via API